Ads allow content creators to provide free useful and compelling content to the public. We may earn money or products from the companies mentioned in this post. See the Affiliates and Disclosures page in the top menu of this website for detailed information.
What is the crochet thermal stitch tutorial
Learn to crochet the thermal stitch with this easy (almost) double thick crochet stitch that makes a heat safe stitch ideal for the thermal stitch potholders.
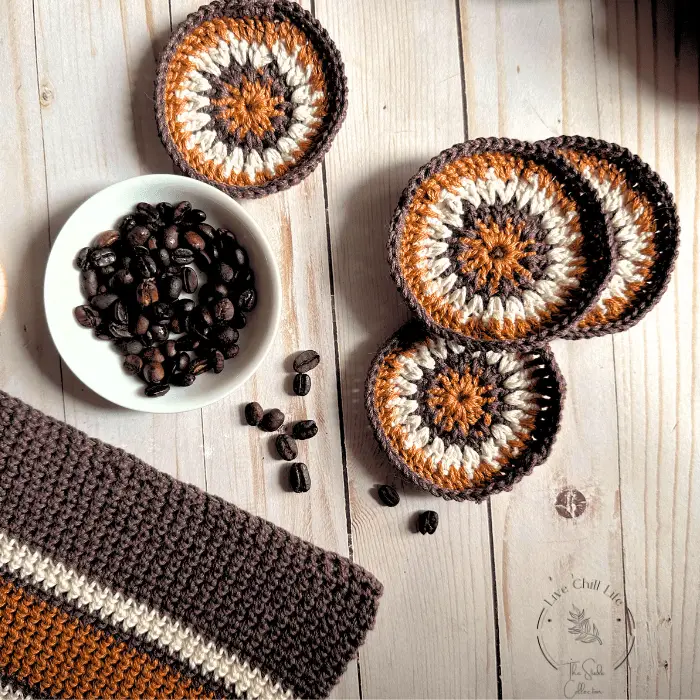
I use the thermal stitch in one of my sturdy bag strap patterns. It is low stretch and has a beautiful woven look. See the matching crochet coasters pattern.
You may find these posts helpful
- How to tie off a crochet project
- One skein crochet projects
- How to soften acrylic yarn
- How to read a crochet pattern
- How to pick yarn for a project
- What is your crochet skill level
- Which are the best crochet hooks
- 5 tips for mastering crochet as a beginner
- How to read a yarn label
- 5 essential tools every beginner needs
Table of Contents
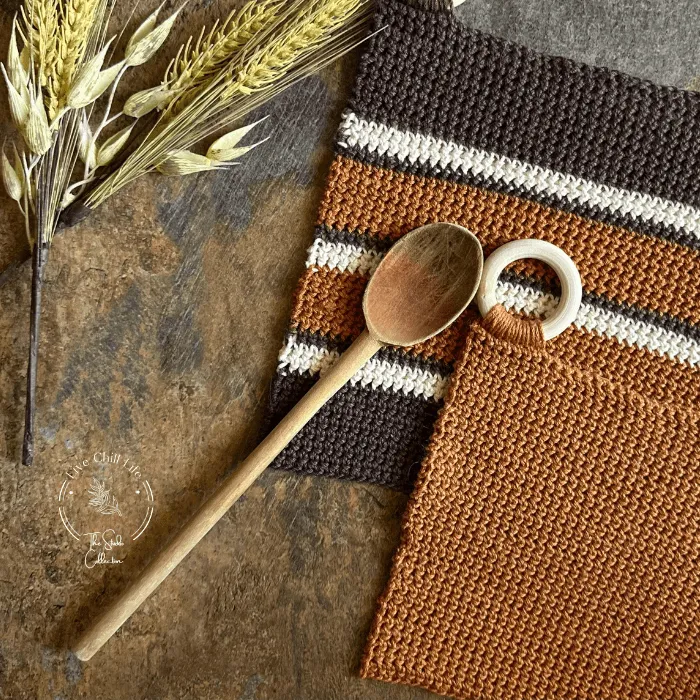
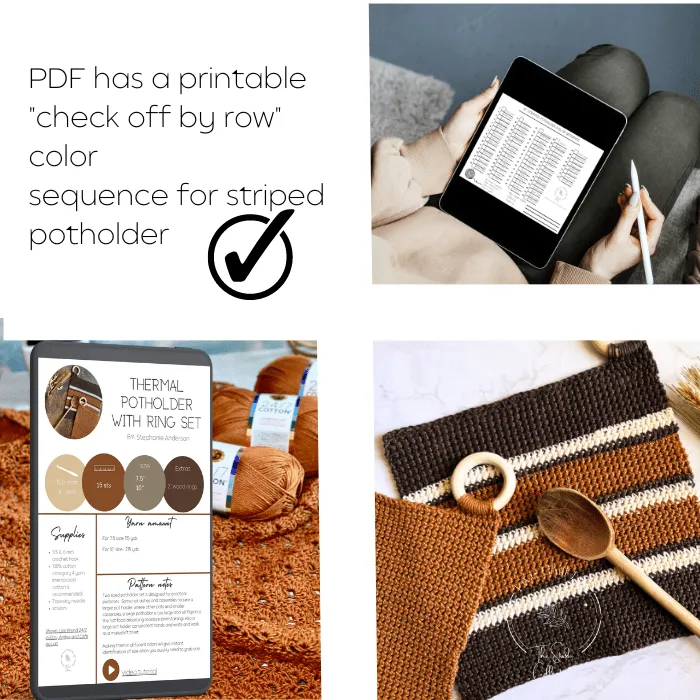
You notice in the images, this set has two sized thermal stitch potholders. I did that for a reason. I am an extremely avid cook. I used to cook professionally in fact and even today I , like many, cook 2-3 meals per day in my home. I am no stranger to a pot holder.
Some hot dishes and casseroles require a larger pot holder, where other pots and smaller casseroles, a large potholder is too large and will flop into the hot food absorbing moisture (and staining). Also a large pot holder can protect hands and wrists and work as a makeshift trivet.
I made the small and large potholders with rings two different colors so my eye instantly knows in those seconds your brain says “get a potholder” which one I will need. Fumbling for sizes , that is not the time to do it so the different colors are practical.
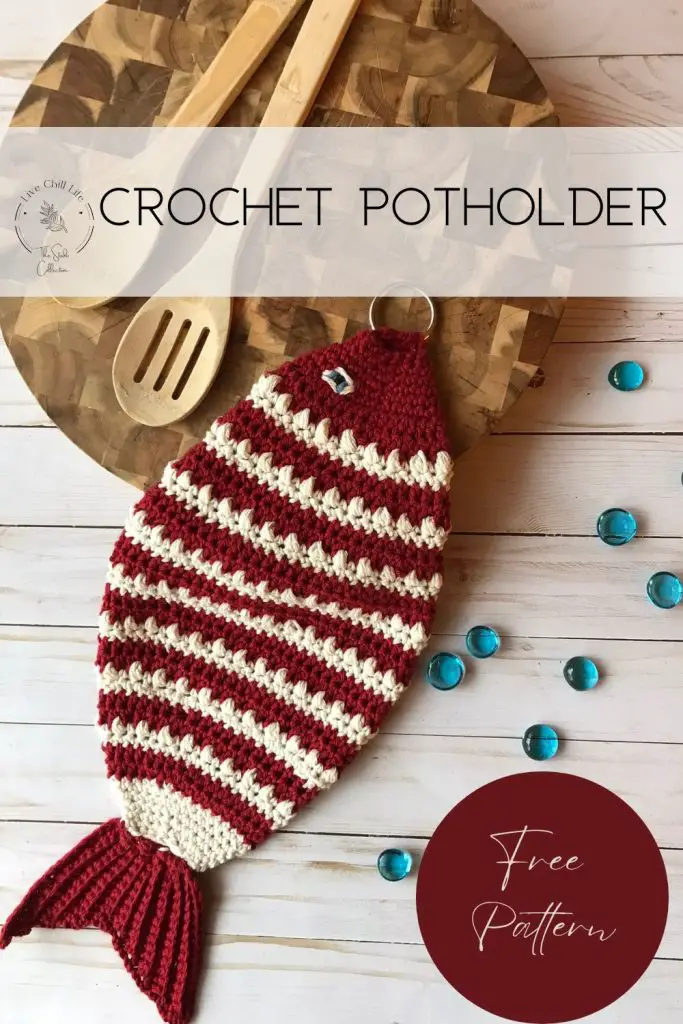
You may like my large double thick fish potholder set
How to crochet the thermal stitch
By using a variation of the single crochet stitch you can work up a thermal stitch potholder easily. Once the set up rows are done you simple work back and forth in back loops to connect the project, stitch by stitch, thus giving it the thermal look.
You may like these other 11 things you can crochet for your kitchen
Materials for a practical crochet potholder set:
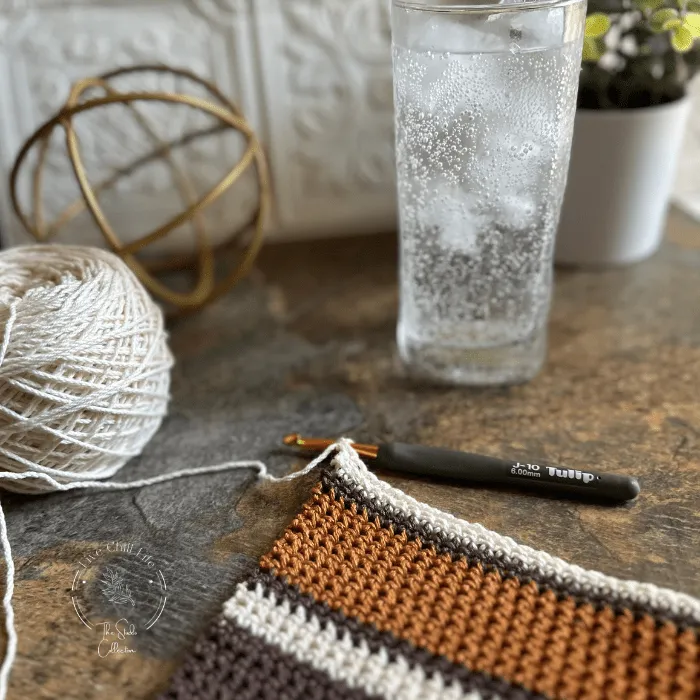
- Category 4 yarn in 100% cotton – mercerized cotton is preferred but not required (shown is Lion Brand 24/7 cotton in Ecru, Amber and Cafe au Lait
- 5.5 and 6.0 mm crochet hooks
- Ruler (use this to check that your length matches your width)
- Wood rings (I am using the 2″ rings in this set)
- Tapestry needle
- Scissors
Yarn amounts:
For 7.5 size: 115 yds For 10″ size: 215 yds
Gauge 4″ = 18 sts
Crochet thermal stitch video tutorial
How to crochet a potholder (using the thermal stitch)
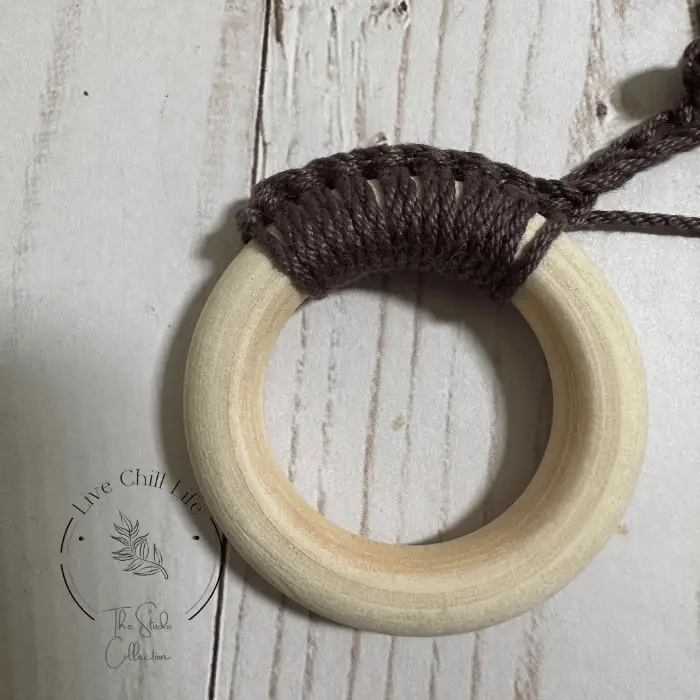
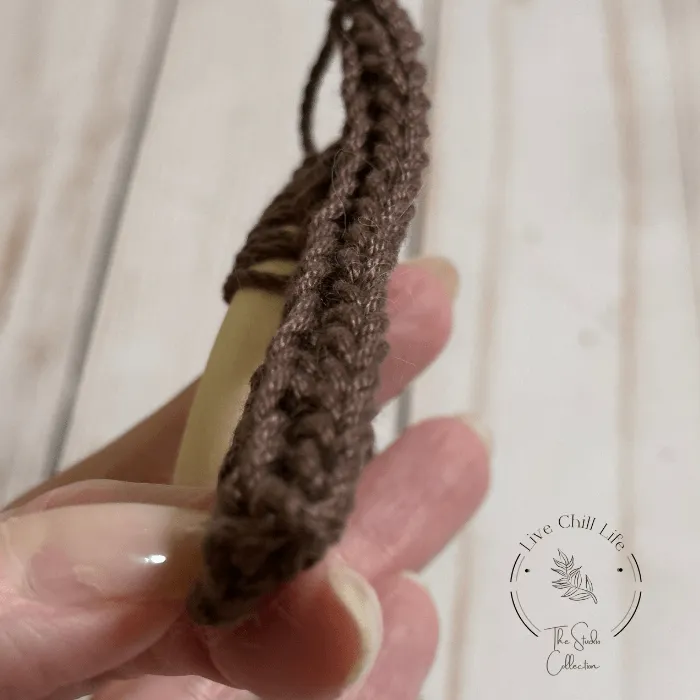
For the 7.5″ potholder, use the 5.5 mm hook. Create your starting loop knot and work 8 sc onto the wood ring, working starting tail under stitches to secure it. Continue to chain another 27. Total 35 chains.
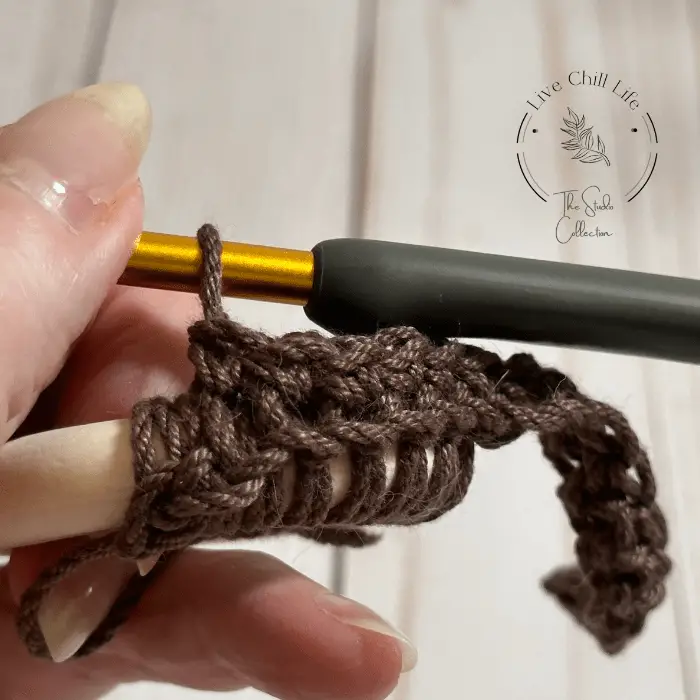
Step 2: Turn your work, in second ch from hook, sc in back loops only all the way back across the row , finishing in the first stitch you made in the wooden ring. 34 sts.
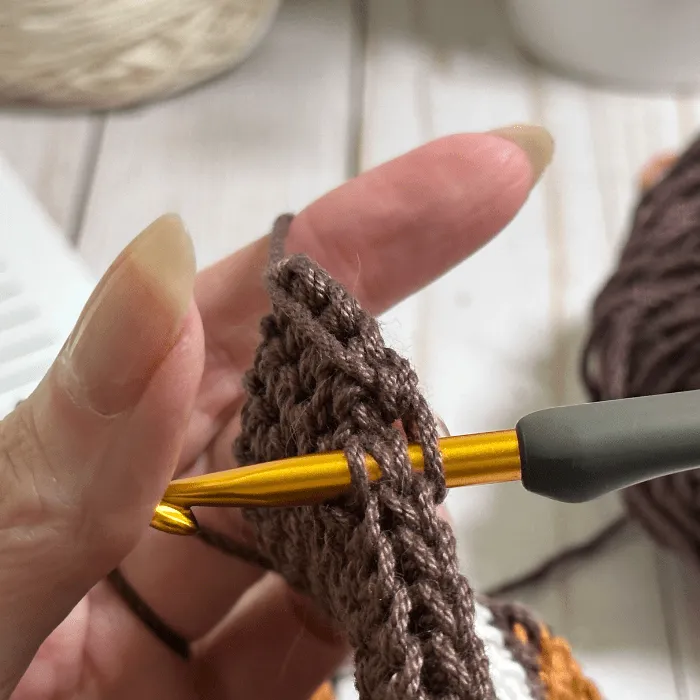
Step 3: Turn work so it faces you like this. You will see staggered rows, the left side sits lower than the right side. Ch 1. Insert hook into back loop of top row and pick up the back loop on the lower row left side, yarn over and pull through both loops.
If you find your hands/arms get sore working in this position check out my tips for avoiding hand and wrist pain while crocheting.
Tip: Be sure to get both loops in the very end stitch. It can look hidden. You may find it useful to employ a smaller hook in the corner (3-4mm hook). If you don’t work both loops the potholder will look lopsided. My favorite for this is the etimo red hook 4 mm. I can’t stress what a must have this hook is in your tool.
Ch 1 and turn at end of each row.
Repeat this row 3 instruction until length matches width . To finish work as follows:
How to finish the thermal stitch final row
Ch 1 turn, Insert hook into entire stitch on right before hooking into the left side back loop, then yarn over and pull through all three loops on hook. Repeat across row. This makes the stitches sit flush.
Cut yarn and weave in end.
Crochet large size thermal stitch potholder
Use the 6 mm hook for this 10″ size.
Chain 45. Begin by attaching yarn to the ring and working the first 8 sts on the ring, then continue to chain remaining 37 sts.
Work pattern as for 7.5″ potholder. 44 sts will be your final stitch count for this pattern row.
The color stripe sequence is available as a check off color chart in the PDF pattern.