Ads allow content creators to provide free useful and compelling content to the public. We may earn money or products from the companies mentioned in this post. See the Affiliates and Disclosures page in the top menu of this website for detailed information.
How to crochet ribbed stitches
Ribbed crochet stitches create textured patterns that often resemble ridges or columns in your finished crochet project.
These types of crochet stitches are frequently used in crochet to add elasticity, depth, and visual interest to the work.
To me, ribbed crochet stitches all add wonderful eye-catching texture to my projects. Some provide great flexibility to hug curves, drape or shape. Others provide more structure and can vary greatly in their ability to drape (or not drape) based on hook size. I will detail how with each stitch covered in this post.
Table of Contents
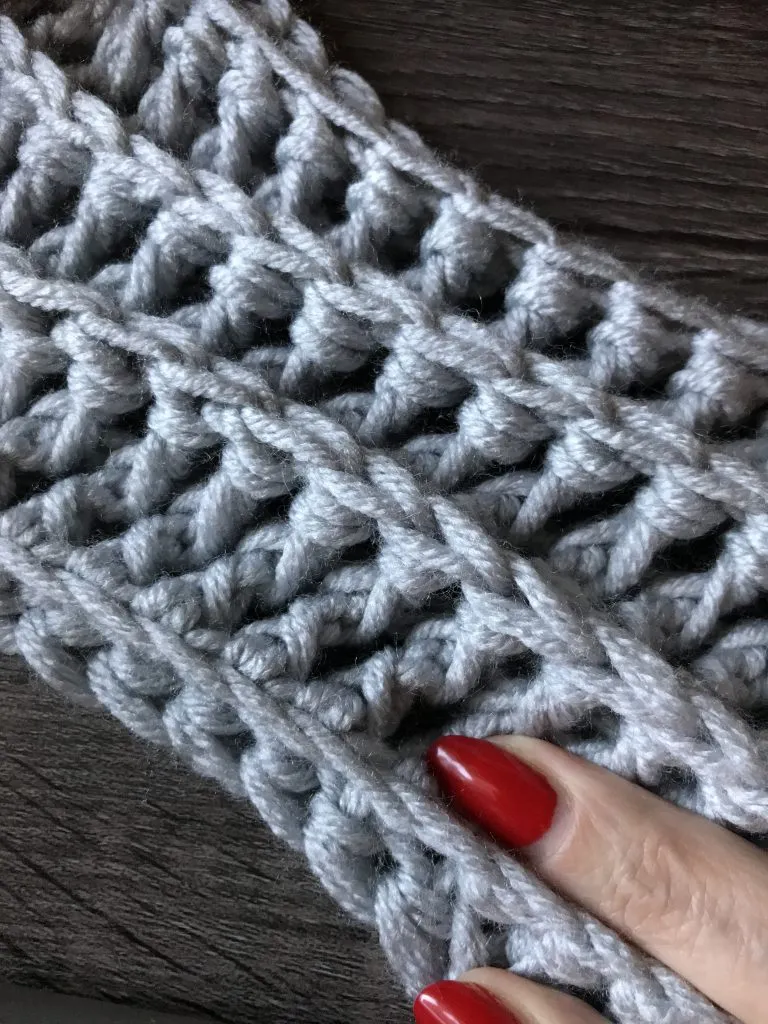
How to crochet vertical post-stitch ribbing
Post stitch does not refer to additional decorative stitching after a piece has been worked. This term refers to stitches worked into the post of another stitch.
This ribbed stitch holds its shape really well. Because of how the ribbing is structured it creates a somewhat stiff result that can have increased drape and flexibility by going up 1-2 hook sizes.
Make a practice swatch:
Work up a test swatch by chaining 27. This is a stitch pattern that has a right side and wrong side. The wrong side is completely flat with all of the texture being on the opposite side.
Two-sided post ribbing is further down the page.

Work up this sample or make this ribbed crochet dishcloth-free pattern here.
Row 1: In second chain from hook work a double crochet then continue to work double crochet stitches to end of row to total 25 stitches. Chain one and turn your work.
Row 2: Sc in first stitch. Continue to work a sc in each stitch to end of row. Chain one and turn.
Row 3: *Sc in first stitch. Front post double crochet around next stitch in the post from row 1. * Repeat from * to * to end of row. Chain one and turn.
Row 4: Repeat row 2.
Row 5: repeat row 3.
Back loop only crochet ribbed stitch
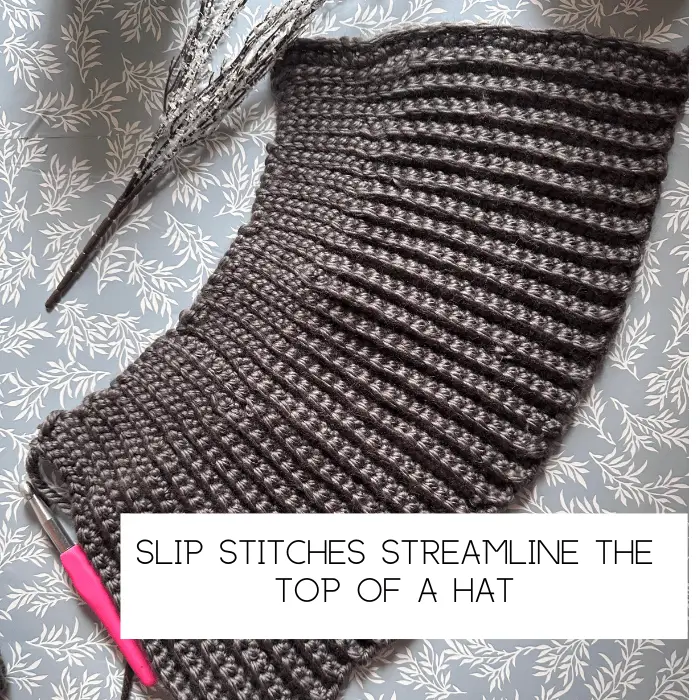
This I find is the most common way to create ribbing for items like crochet ribbed hats and cuffs or bands on projects like tops and crochet cardigans.
In the free pattern for this chunky ribbed hat, I simply worked a chunky yarn into the back loop only of each stitch and the top stitches are all slip stitches to allow the top of the hat to narrow.
This is a stretchy and pretty crochet stitch and doesn’t use up as much yarn as post-crochet ribbed-style stitches. See the ribbed hat pattern.
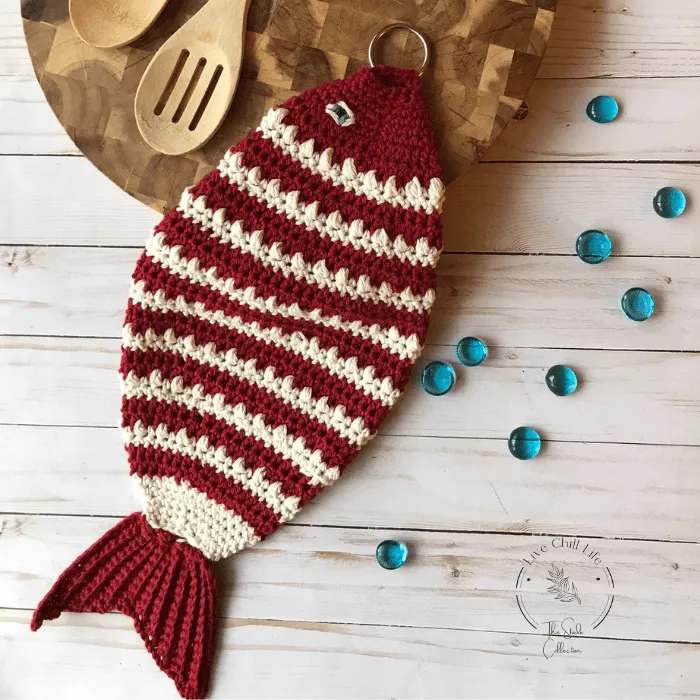
The clownfish double thick free potholder pattern uses this simple rib to create a textured tail.
Horizontal double crochet reversible post stitch ribbing
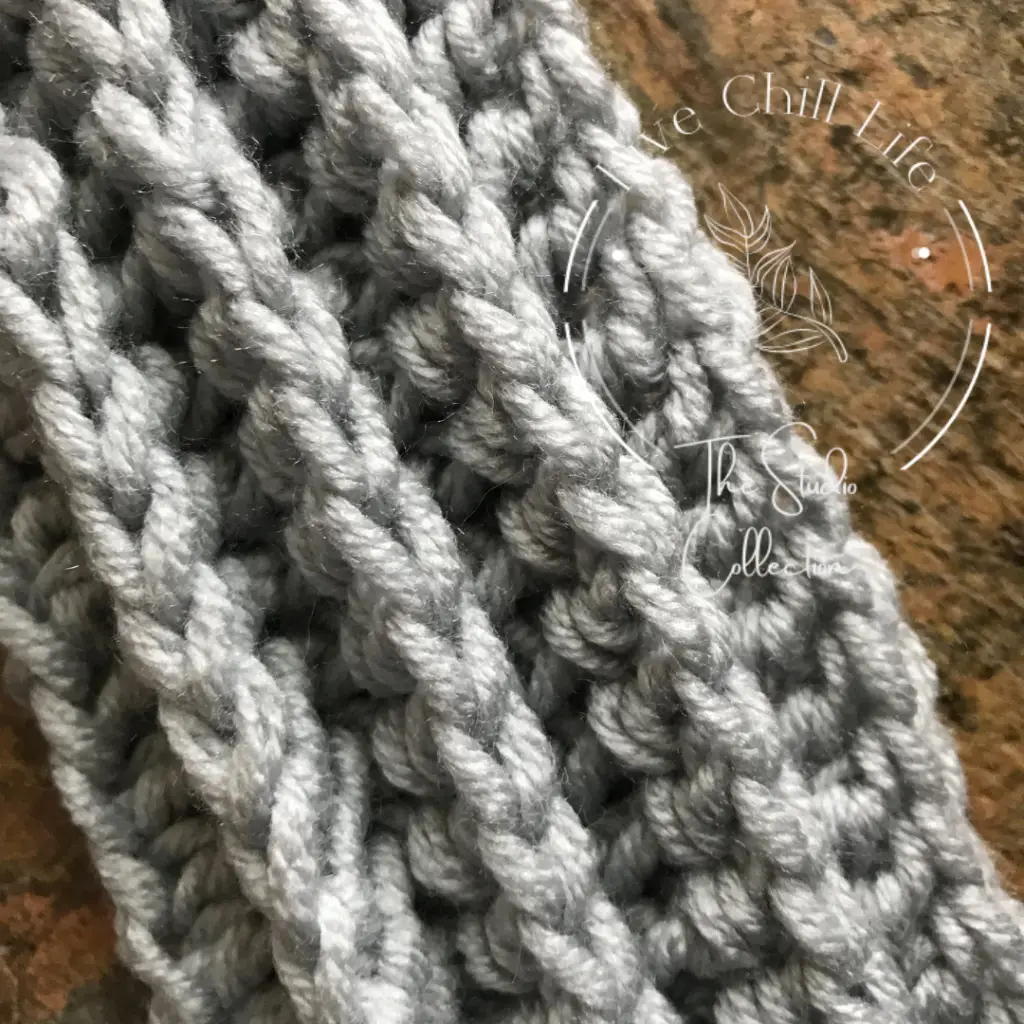
This ribbed stitch works into posts rather than the top of the stitch. It creates a highly textured 3D look that is fun for cozy chunky yarn blankets. It is flexible, warm and inviting. You can use lighter worsted yarn in your designs to add texture to scarves, hats, garments or pillows.
To make a sample swatch chain 20.
Row 1: In the second chain from hook work adouble crochet and continue to work double crochet stitches all the way across. 18 stitches total.
Do not chain when you turn your work.
Row 2: Working directly into the first post, work a front post double crochet around it. Continue to work front post double crochet stitches across the row. 18 double crochets total. Turn.
Do no chain. Repeat row 2. Keep count of your stitches so you always have 18. The end post can be hard to see but fish around until you find it and work into the post to finish your row.
I also used this style of stitch to create dramatic texture in this free pattern for a crochet table runner. Check out the pattern and make a table runner for yourself or as a lovely gift. Rather than using double crochet to create the rib, it is a half double crochet. All the basic crochet stitches can be worked to create post stitch ribbing.

Using slip stitches to create ribbing
We often use slip stitches to finish a project or to join a round. Slip stitches are still stitches and can be used as full rows. Just keep in mind they need to be worked loosely or it will be hard to work in to them when you are working your next crochet pattern row.
Slip stitches also help projects hold their shape and prevent droop. I talk about this in the 5 types of no stretch crochet stitches.
ch- chain
sc – single crochet
sl st – slip stitch
- Starting chain: Create foundation ch, as wide as you want the depth of your rib. stitch count won’t matter as this is all single crochet
- Row 1: Sc in each ch across the row. Ch1, turn.
- Row 2: Sl st, back loop only across the row, ch1, turn. If you have trouble keeping your slip stitches loose, go up a hook size for this row.
- Row 3: Sc blo across the row, ch1, turn.
Repeat rows 2 and 3 until you have the desired length you’d like.