Ads allow content creators to provide free useful and compelling content to the public. We may earn money or products from the companies mentioned in this post. See the Affiliates and Disclosures page in the top menu of this website for detailed information.
Free crochet slipper pattern for women
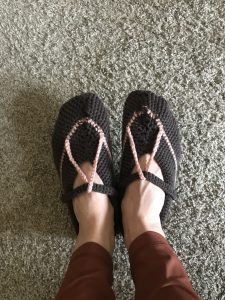
The Fiona free crochet slipper pattern is entirely feminine.
Two tones with a maryjane style works up quickly. You can whip up a pair in a weekend easy breezy.
This is a beginner-friendly crochet slipper that uses stitches you already know and a video tutorial to get the straps worked in. What is your crochet skill level? See the chart.
Table of Contents
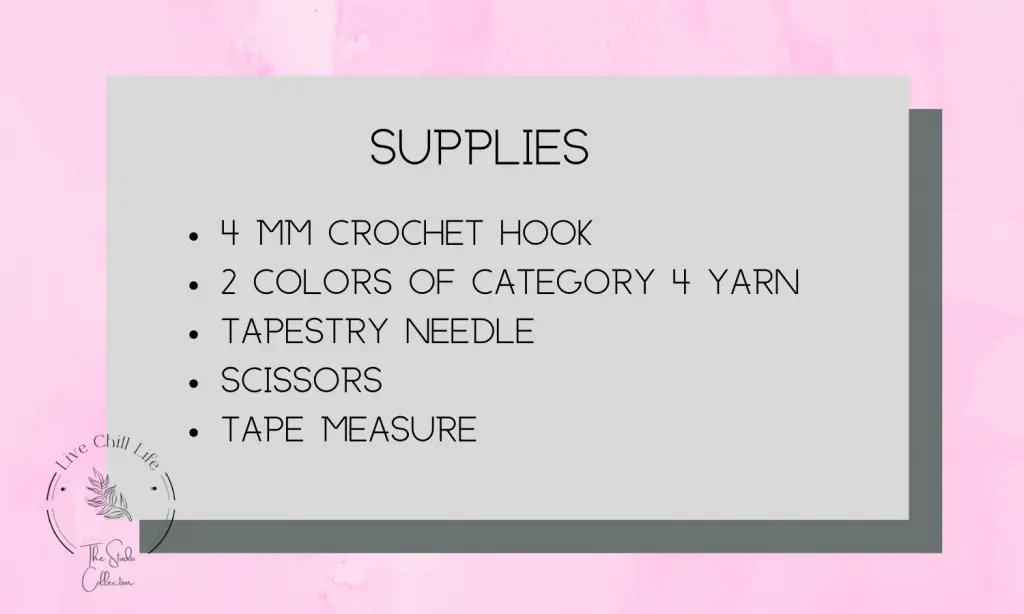
Materials needed to make a free crochet slipper pattern
The crochet upper is all single crochet so no tricky stitches to remember after working your sole.
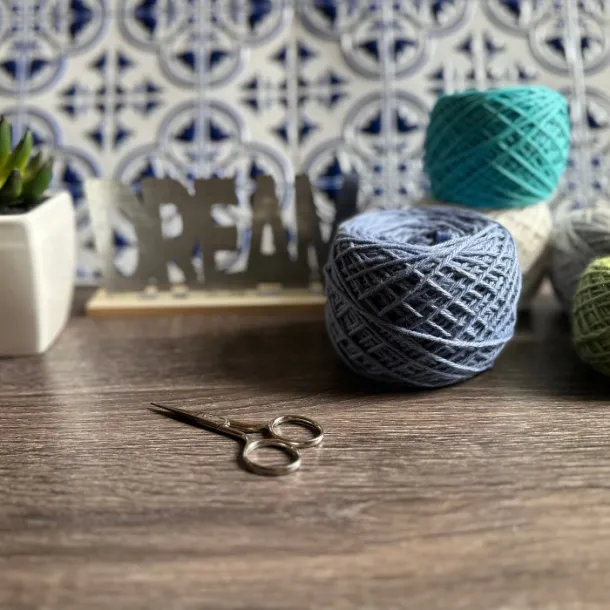
Pick two colors in category 4 yarn, cotton or acrylic (I have a pair in both so summer feet can be cute too!), a 4 mm crochet hook, stitch marker and tapestry needle.
Check out my guide for three types of methods to make your soles nonskid here.
You may also like this post on 10 free crochet slipper patterns
Yarn used in image is I love this yarn from hobby lobby in graphite and rosy cheeks.
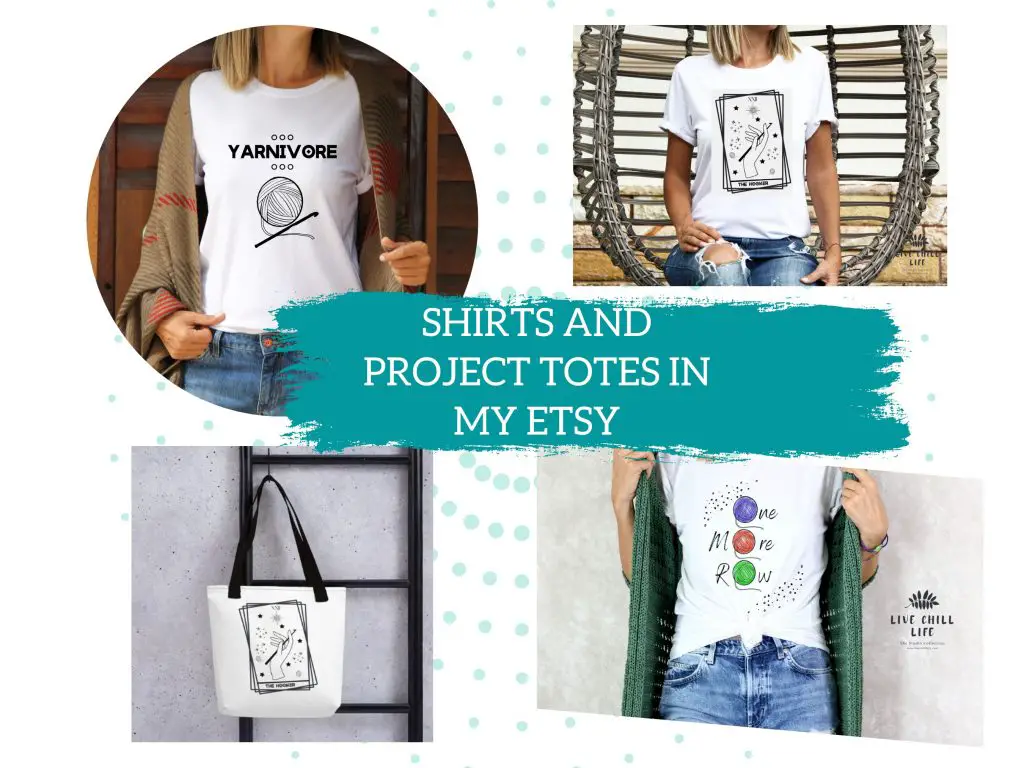
T-shirts and project totes for crocheters available in my Etsy shop!
Free crochet slipper pattern
Begin by making sole in desired size linked below then proceed to round 6.
women’s size 5/6 Euro 38-39
women’s size 7/8 Euro 40-41
women’s size 9/10
Euro 42-44
women’s size 11/12
Euro 45-46
US terms:
- sc: single crochet
- sc2tg : single crochet two together
- sc3tg: single crochet three together
After working sole linked above start with round 6 below.
Round 6: This round will work the curve upward by working in the back loop only. SC BLO 84, 88, 92, 96 sts
Round 7 : Mark the center toe stitch with stitch marker (42,44,46,48). sc to stitch marker and sc3tg replace marker then finish to end of round. Slip stitch to join. 82, 86, 90, 94 sts
Round 8-9. Sc around 82, 86, 90, 94
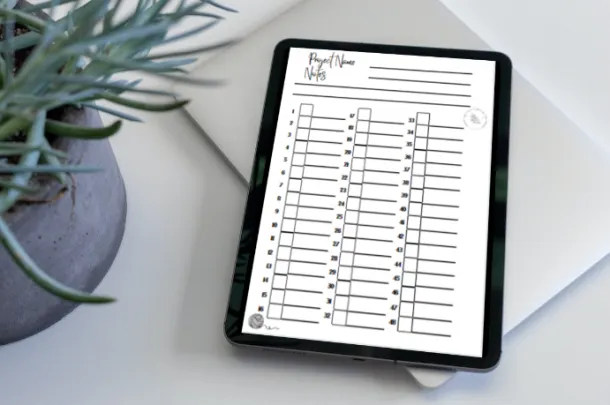
I designed project trackers! This is the large print version for tired eyes. So much easier than using apps, scraps of paper or a plain notebook.
Three project sizes, a handy ruler and hook guide inside the cover and plenty of room for notes in each pattern.
Buy it here.
Regular size print here.
I have had bad eyesight since age 18 so large print is a godsend when you can’t see apps and dark yarn, let alone going from one to the other on a crochet-a-thon during a netflix binge.
Mark toe box as above. Insert two additional markers, one 4 sts before and 4 sts after center marker. Then work round 10.
Round 10: sc first 6, sc2tg next, then sc to first stitch marker. Sc2tg stitch before marker and marked stitch then replace marker, then center sc3tg at stitch before, center stitch and after then replace marker. For next stitch marker sc2tg in marked stitch and stitch after marker. Replace marker after join, sc until 7 sts remain. Sc2tg 7th and 6th stitch then sc to end of round. 76, 80, 84, 88
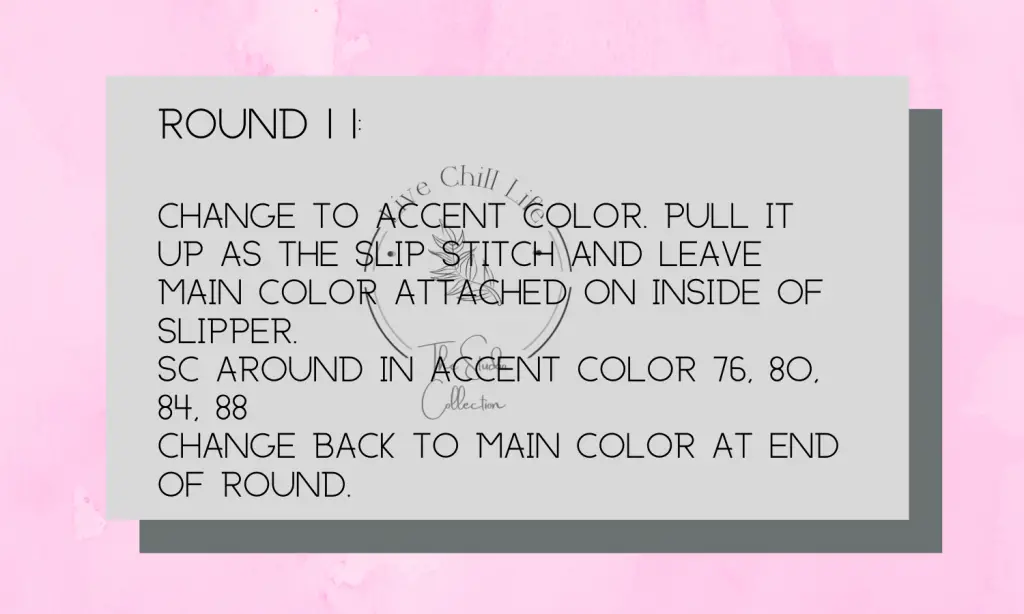
Round 12: sc to stitch markers and repeat toe box as row 10. 72, 76, 80, 84
Round 13: repeat row 12 68,72,76,80
Round 14: repeat row 12. 64, 68,72,76
Round 15: Begin round as prior row. At the toe box area the join markers will no longer have enough stitches to make three joins so you will work one central sc3tg. Keep center stitch marked for next rounds. Sc2tg last stitch of round to begin to tighten heel. 60, 64,68,72
Round 16: sc2tg first stitch then continue round working sc3tg in center stitch marker at toe box 58,62,66,70
Round 17-18: Repeat row 16.
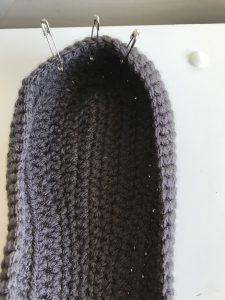
Cut yarn and weave in end.
Accent straps:
Chain length without tails for accent color strap:
Size 1 – 6″
Size 2 – 6.5″
Size 3 – 7″
Size 4 – 7.5-8″
Count 7 stitches to each side of the center accent stripe. This is where the strap ends will be inserted. See video on how to insert and secure strap.
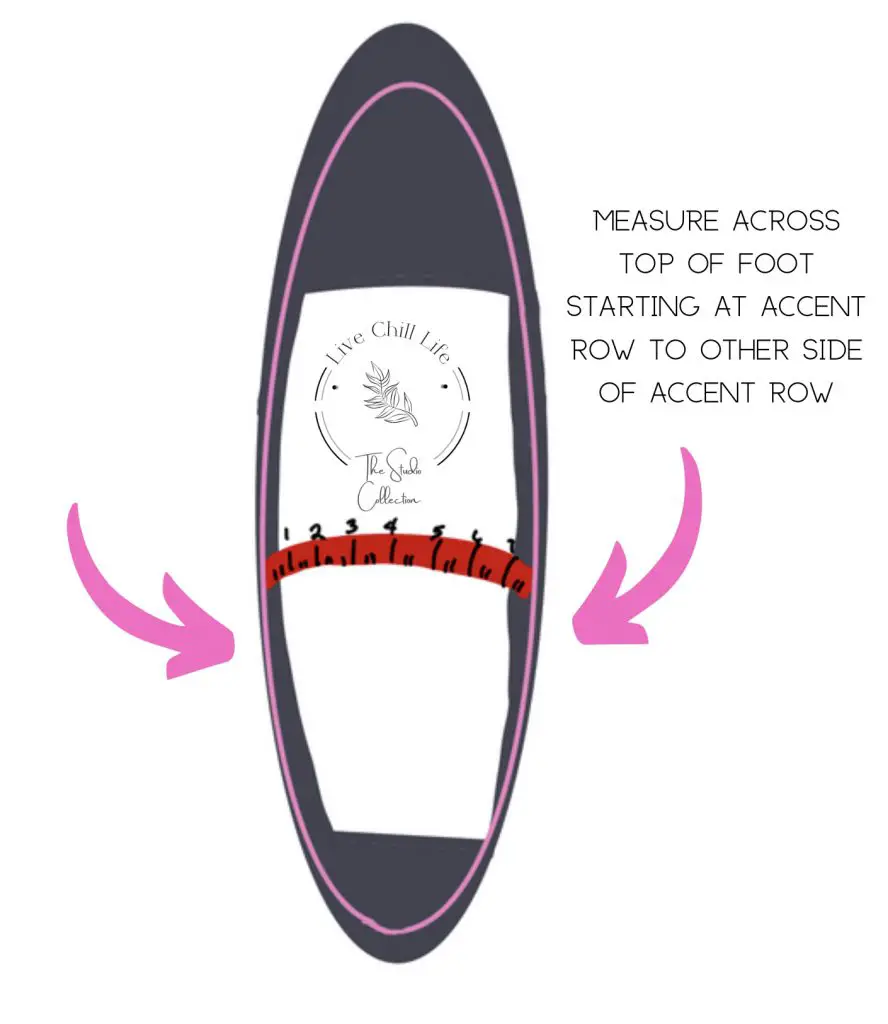
Top across strap:
Because of foot width variation you will need to measure across the top of the foot. Using a tape measure while wearing the slipper, measure from the accent row across the top of the foot to the other side accent row. Keep tape loose. It is better to chain too many than too few because the longer chain can be tightened once completed.
Chain enough stitches to achieve the measurement leaving a 3-4″ starting tail. In second chain from hook slip first two stitches then sc in back loop across row slip stitching last two stitches. Cut yarn leaving same length tail as starting tail. On opposite end grab two loops with hook and pull through a 6-8″ length of yarn so the two tails match other side. Pull the long tails through each side just at the accent color line and secure with large knots inside slipper. Snip away loose ends once fit is secured.