Ads allow content creators to provide free useful and compelling content to the public. We may earn money or products from the companies mentioned in this post. See the Affiliates and Disclosures page in the top menu of this website for detailed information.
The Golden Hour Blanket is a free crochet pattern featuring an easy, richly textured cluster stitch and a gothic shell stitch border that makes this blanket look far more advanced than it actually is. This free version includes everything you need to make the small size — ideal as a baby blanket or lap throw. If you fall in love with the stitch (and you will), the full pattern includes two additional sizes, Throw and Full/Queen, so you can make this blanket for every room and every person on your list.
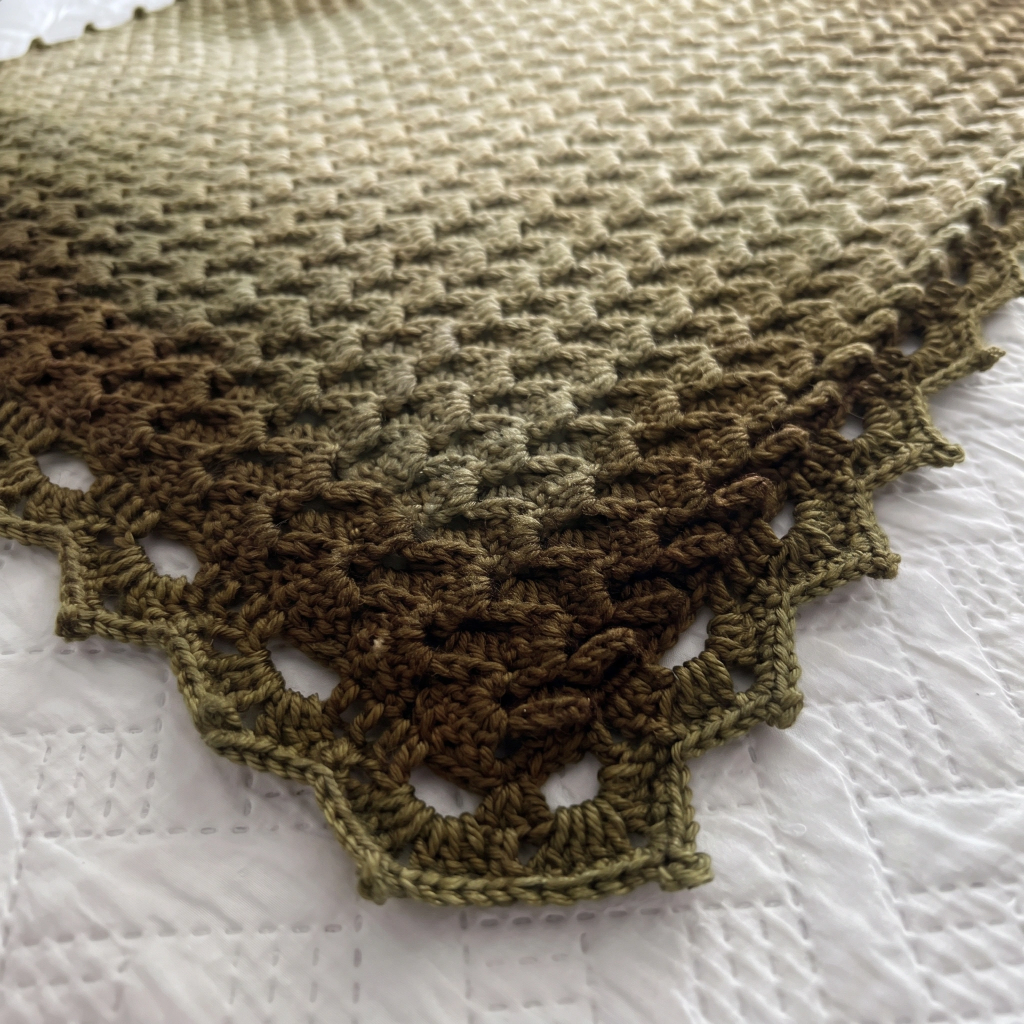
Fern Green Tones colorway
This free pattern makes the small size. Ready for Throw or Full/Queen? [Get the full Golden Hour Blanket pattern here.]
Materials to make the Golden Hour Blanket
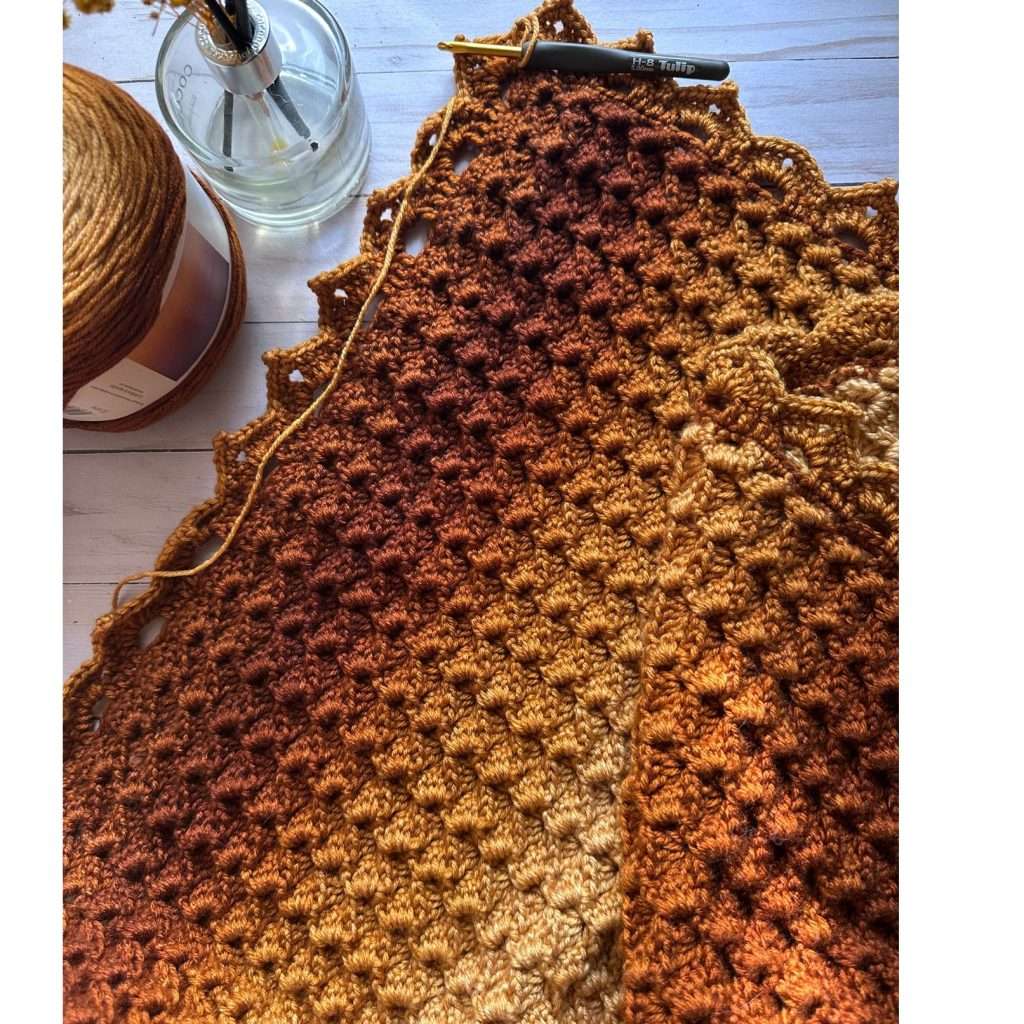
- Premier Yarns Everyday Worsted Anti-Pilling Gradient yarn (200g / 360 yards per skein) — 4 skeins for the small size shown here
- Crochet hook, 5mm (for thin cat 4 yarn, as shown)
Note: if using a thicker or standard-weight cat 4 yarn, size up to a 5.5mm or 6mm hook for proper drape. This will make your finished blanket approximately 20% larger overall than the measurements listed here.
- Stitch markers (at least 6–8 recommended for tracking border shell placement)
- Tapestry needle for weaving in ends
- Scissors
The Golden Hour Blanket — Small Size
(Finished size: 27.5″ x 36″ before border which will add approx 3 to each side 31 x 39″)
Foundation Chain: Ch 106
Row One: Sc in 2nd and each across, ch 1, turn. (105 sts)
Row Two: Sc in 1st st, ch 2, 4 dc in same st, *sk 3, [sc, ch 2, 4 dc] in next st*; rpt across, sk 3 and sc in final, ch 1, turn.
Row Three (Cluster/Shell Row): Sc in 1st st, ch 2, 4 dc in same st. *Sk 3 dc, [fpsc, ch 2] around next dc, 4 dc in next ch-2 sp*; repeat from * to * across. Fpsc in final dc, sc in top of turning ch, ch 1, turn.
Shells per row: 26
Repeat Row 3 until you reach 43 rows total. Ch 1 turn.
Continue to next section to close out the final row and begin your border.
Blanket Border
Round 1 — Closing Row / Border Start
This closes up the last row and counts as the start of Round 1 of your border.
Setup first: Place a stitch marker at shells 9, 18, and 25 — this keeps you from losing count of which shells get 3 sts, so you can focus on keeping your edge smooth and flat.
For marked shells: skip first dc and sc in remaining three dc in shell= 3 sts. For all other shells: sc into each of the 4 dc = 4 sts.
Work 3 corner sts into the corner space at each end.
Short side stitch count: 104 sts total. (101 sts across shells + 3 corner sts)
Continue down the long side: work in the same manner across for a total of 126 sts, then work 3 corner sts. (this is approx 3 sts per shell row)
Long side stitch count: 129 sts total.
Repeat across all 4 sides (2 short, 2 long). Mark the center st (2nd st) of every corner made this round. Do not slip to join this round.
Round 2 — Shell setup round
Ch 3, sk 3, dc in next 4 sts. *Ch 3, sk 3, dc in next 4 sts*, repeat from * to * across.
Repeats: short side 14, long side 18.
At each corner: work one last ch 3, sk 3, then 3 dc into the center corner st that has the stitch marker in it.
At the end of the round, slip st into next ch-3 sp from previous round, ch 1.
Round 3 — Cluster Round
(3 dc, ch 2, 3 dc) into the ch-3 sp. *Ch 1, sk 1, sc2tog, ch 1, sk 1, (3 dc, ch 2, 3 dc) into next ch-3 sp*, repeat from * to * across to corner.
At each corner: ch 1, sk 1, dc into center corner st, ch 1, sk 1.
Repeat on remaining 3 sides. At end of round, after working your final stitch in the corner, move on to round 4.
Round 4 — Sc/Picot Edge Round
Ch 1. *Sc in each of the next 3 dc of the cluster, 2 sc into the ch-2 sp, picot (ch 3 + sl st into the first of those 3 ch sts), 2 more sc into the same ch-2 sp, sc in each of the remaining 3 dc of the same cluster — completes 1 full shell.
Slip st into the sc2tog from the previous round*, then repeat from * to * around each side.
At each corner: slpst in top of the center dc, continue to next side.
Join with a slip st to first sc to close the round. Cut yarn weave in ends.
Help: my final round of picot is curling? This may happen with the heavier cat 4 yarn or tight stitchers, Work sc between your shells and the slip stich between them.
Live Chill Life Blanket Collection
Crochet Blanket Patterns You Will Love
Beginner — one-row repeat fishtail stitch, no holes, any size
Confident beginner — romantic textured heirloom design
Easy beginner — modern textured stripe, worsted weight
Beginner — four color method, stunning graphic design
Easy beginner — chunky yarn, quick one-stitch pattern
Beginner — flat cluster texture, works up fast
Beginner — chunky ribbed texture, cozy and fast
Beginner — free pattern, beautiful alpine border detail
Beginner — free pattern, colorful rainbow baby blanket
Comfortable beginner — knit-look texture, cool weight cotton
Beginner — 3D shell stitch, free pattern, sizes small to full/queen