Ads allow content creators to provide free useful and compelling content to the public. We may earn money or products from the companies mentioned in this post. See the Affiliates and Disclosures page in the top menu of this website for detailed information.
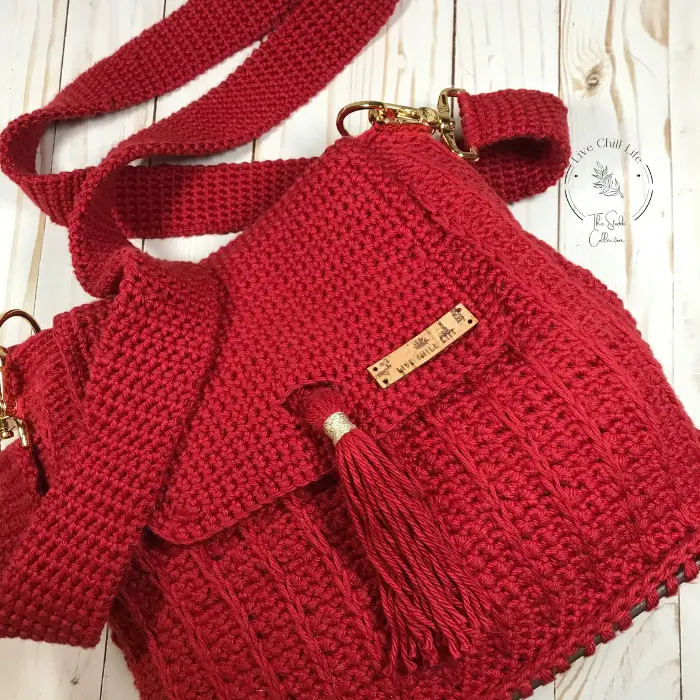
Crochet brickle bag drawstring pattern
This versatile modern crochet bag pattern features a simple stitch and by simply changing out the strap, it looks stylish as a crossbody bag or a satchel.

This bag works up quickly thanks to category 6 tube (or tape) yarn. It looks smooth and polished with a subtle texture inspired by cobblestone.
You will be able to customize the size you like for this bag. Use a base that suits you. Round, square or oblong as shown. Bag shown is a generous 12″ base and uses exactly two skeins of Lazy Days yarn (I don’t want you having to buy a third skein of a pricey yarn only to use a small amount of it)
Table of Contents
You may also like the Make mine topaz crochet crossbody bag pattern
Materials to make the crochet drawstring bag
The finished size as shown is 12 w x 10.5″ H
- Bag base (I am using one from this set)
- Category 6 tube, ribbon or home dec yarn (amount will vary based on size bag) As shown, 2 balls to total 250 yards.
- 8 mm and 6 mm crochet hook plus smaller size to work first round of stitches into base
- stitch markers
- hardware and strap (D-ring and strap with connectors) Shown 2″ D ring
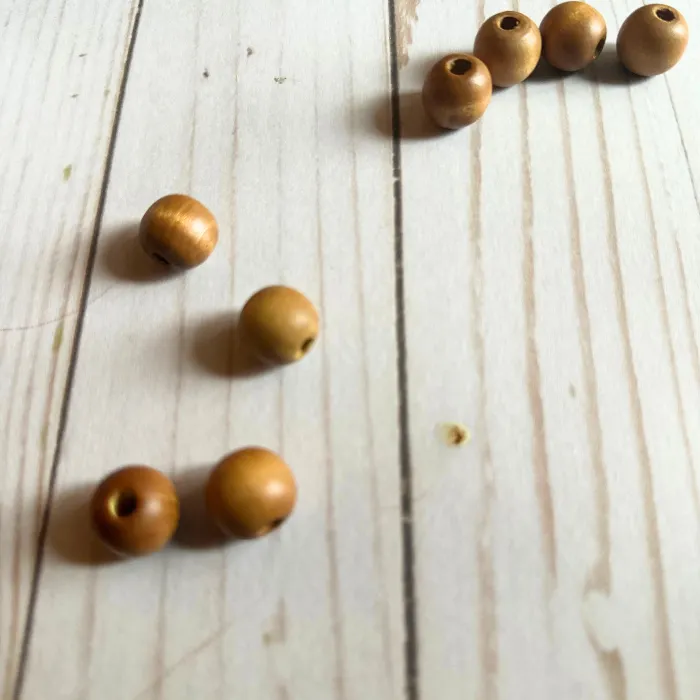
- wood beads
- tapestry needle
- scissors
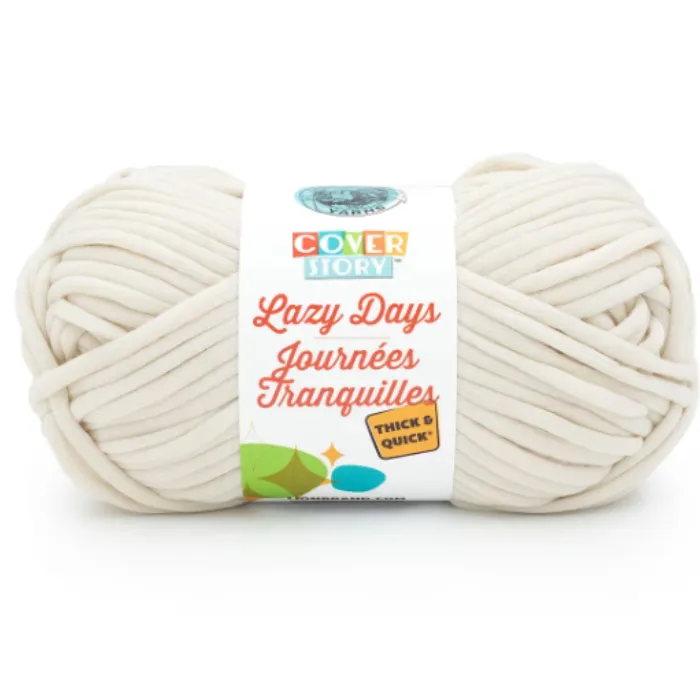
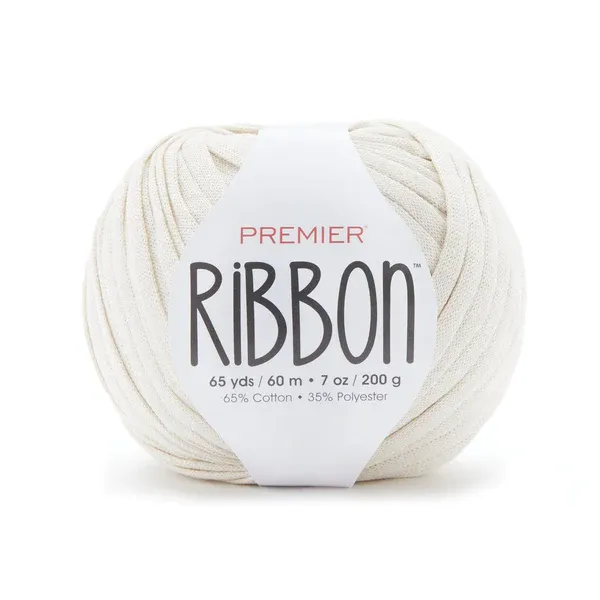
Yarn shown is Lion Brand Cover Story Lazy Days in cream
Other yarn options:
Premier Ribbon yarn
hobbii ribbon yarn
You can use Bernat home dec yarn but it is a category 5, go down a hook size. The texture will look more fine than the image shown and additional yardage is needed to achieve the size.
Crochet US terms used in this pattern
sc- single crochet -exsc – extended single crochet (place hook above exposed front loop of row below to work the stitch)
Crochet bag pattern
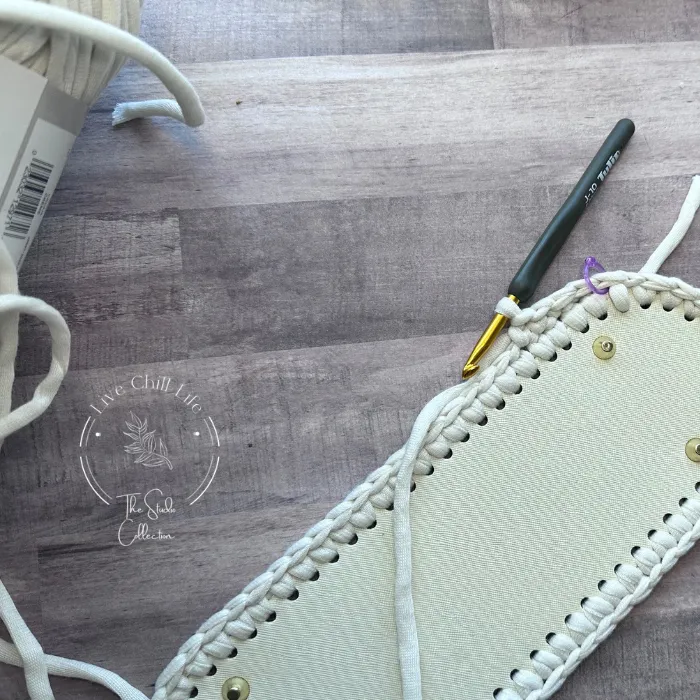
Begin with your small hook that will fit in your base hole openings, sc around with tail on the inside of bag base. Slip to join after you’ve finished the round.
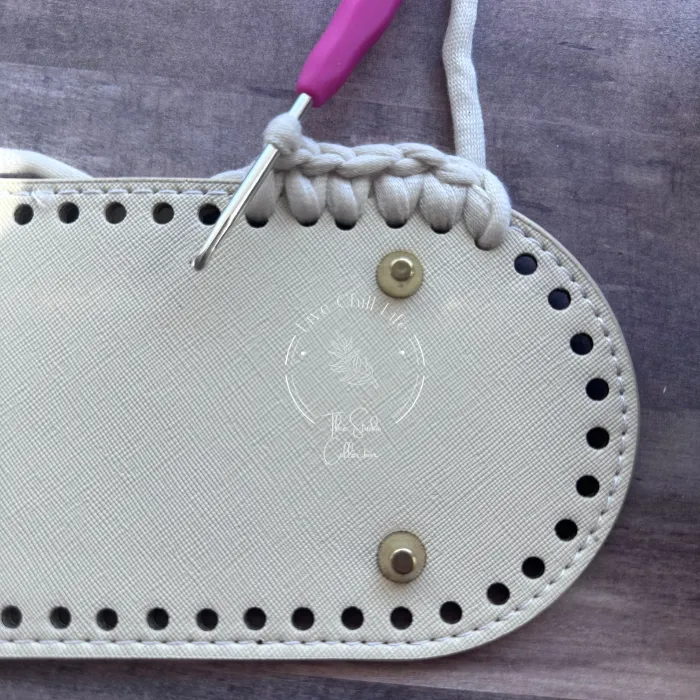
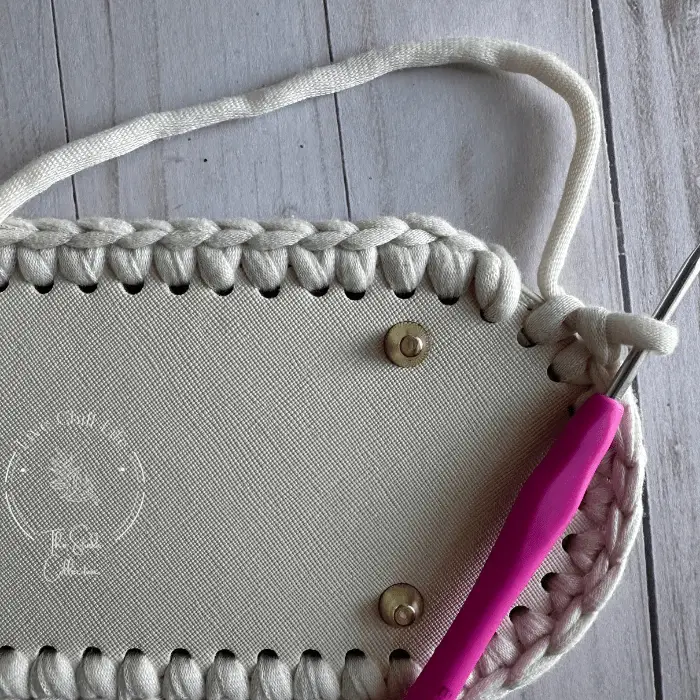

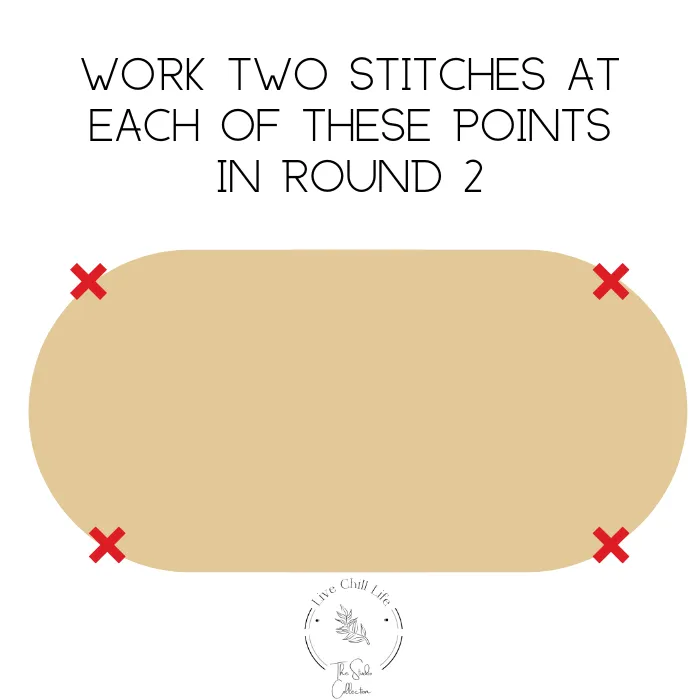
Round 2: Move up to a larger hook, 6 mm, for next round. Mark first sc you make. Count stitches. You will need to end with an odd number. If you need to increase by one to achieve an odd number, work 2 sc into one stitch. I find working two stitches into the corner-ish areas creates a better look or else the body can shrink in too much from the base- see image below.
Do not slip to join hereonout. You will work in a spiral for the depth.
Round 3: Change to 8 mm hook. Remove stitch marker. Make sure bottom of bag base (if it has “feet” is facing downward as this row will build up the sides of the bag. Working in back loop only, scblo around.
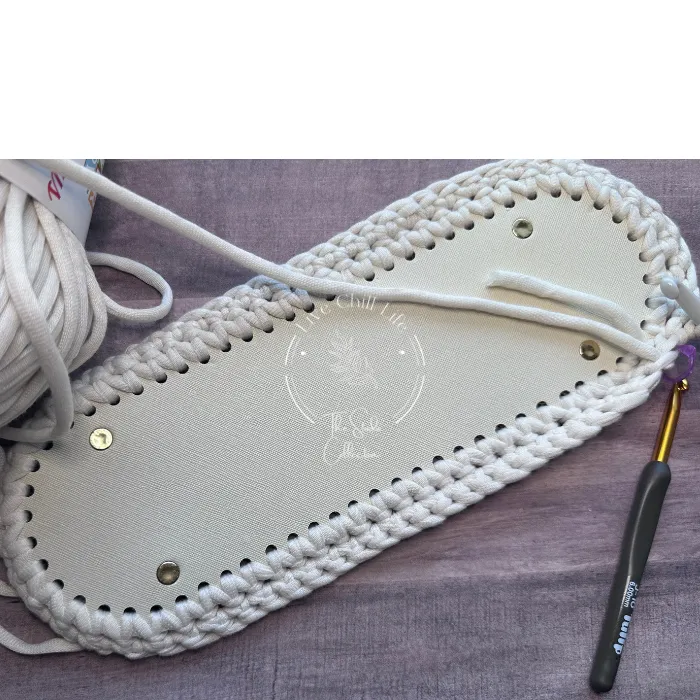
Round 4: The first stitch is exsc as shown. Insert hook just above the front loop exposed from the previous round (this is an exsc). Blosc next. Repeat exsc and blosc around.Carefully work those two stitches in corners so your stitch count remains on point.

Note the extended single crochet is worked just above the exposed front loop from row below
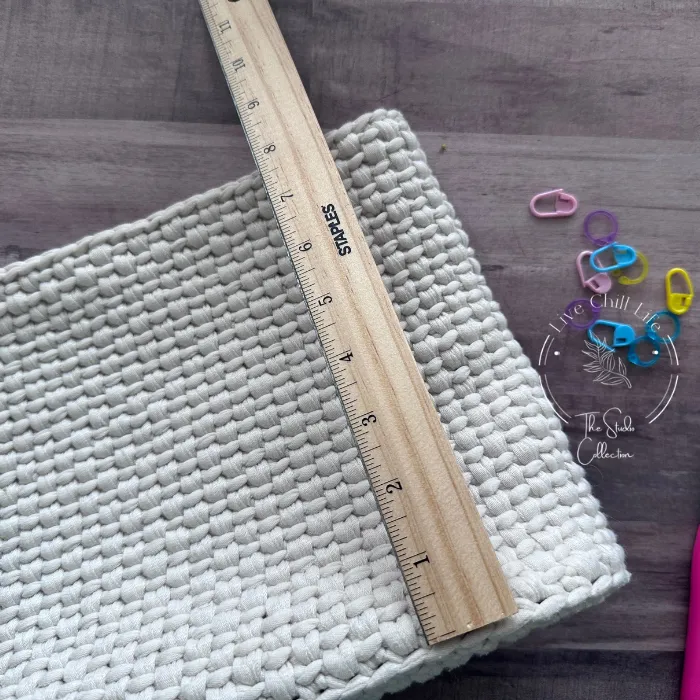
Continue alternating blosc and exsc until your bag is the depth you’d like. Shown, worked to 8.5″ depth.
T-shirts and project totes for crocheters available in my Etsy shop!
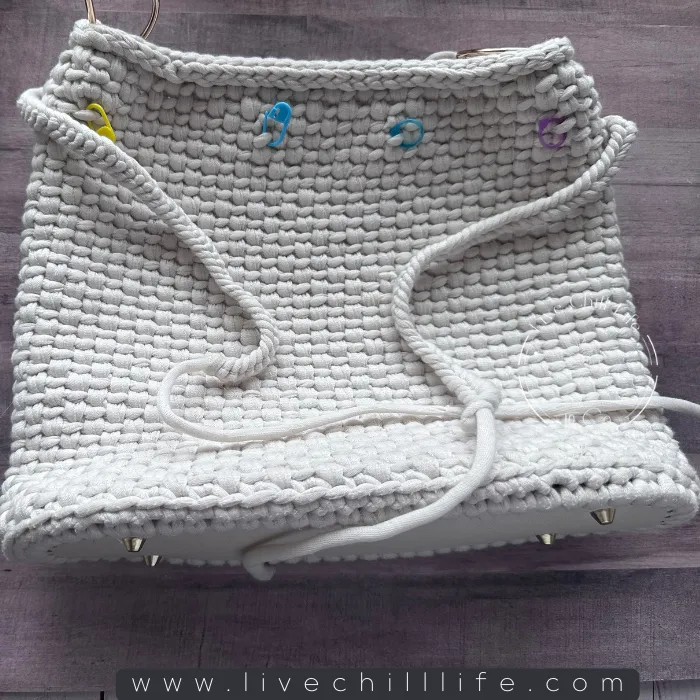
Create spaces for drawstring
Once you have the bag depth you’d like, the final 2-3″ of the bag will be the drawstring spaces. Mark where the openings will be as shown. Place locking stitch marker in the front loop of the chain space.
You will need an even amount of spaces for the drawstring to weave in and out and come together in the front of bag. Bag shown has 10 spaces.
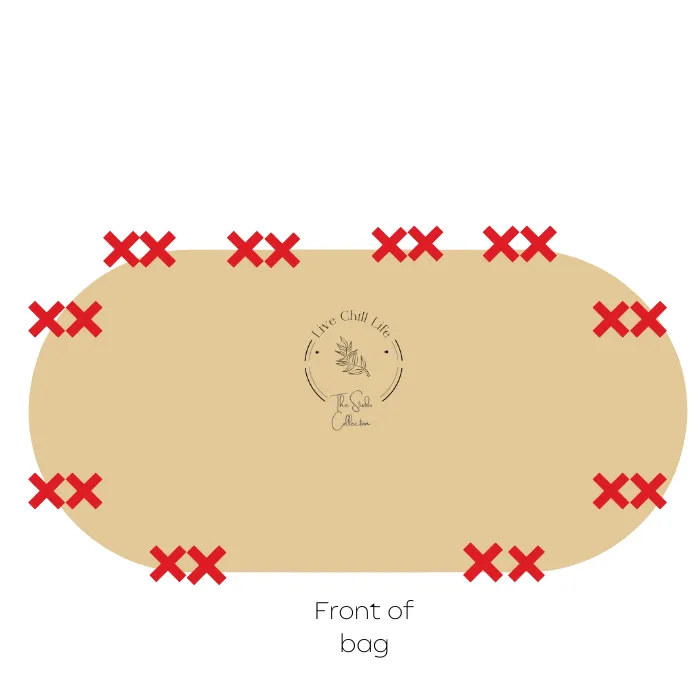
You will ch 2 ,sk 1 at each of the stitch marker spaces to make a wide opening for this bulky yarn. When working the following round work only one stitch in the ch-2 sp. Leave stitch markers in place for finishing steps.
Continue working around a total of 3 rounds (work 4-5 rounds more if using category 5 yarn).

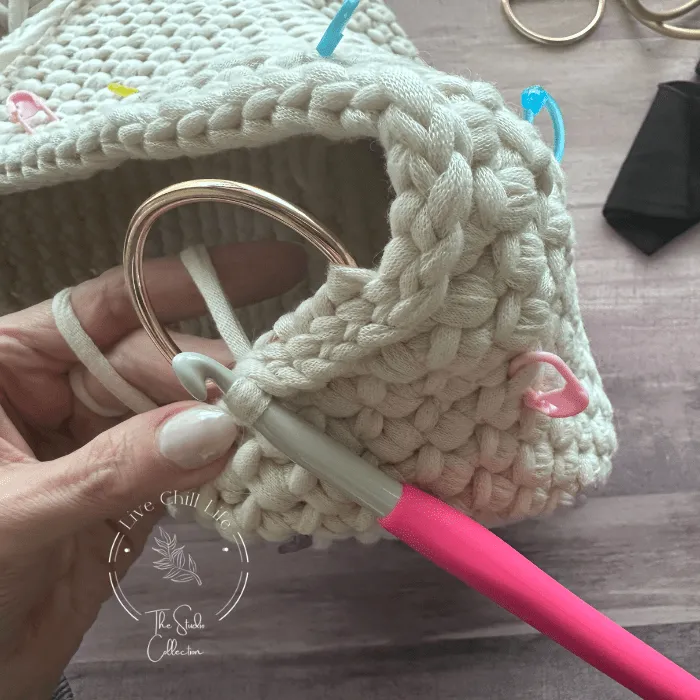
Slip stitch the entire next round. Get D ring hardware in place for final round of slip stitches and work them into the sides of the bag as shown in second round (they will be worked in between the two side bag stitch markers). If you have enough yarn left, keep working 1-3 more rounds of slip stitches but it’s optional. If you like, working from the other end of the skein, make your drawstring and see how much you have left of working yarn to use up in the top round.
Additional slip stitch rounds create a prominent top “lip” for the bag. Cut yarn and weave in end.
Check out my project trackers!
Check off style tracking with room for a note on each row.
Large print and regular print available. Large print is great for tired eyes.
Sections for small, medium and large projects so you don’t waste any pages.
See the Shop my Books section.
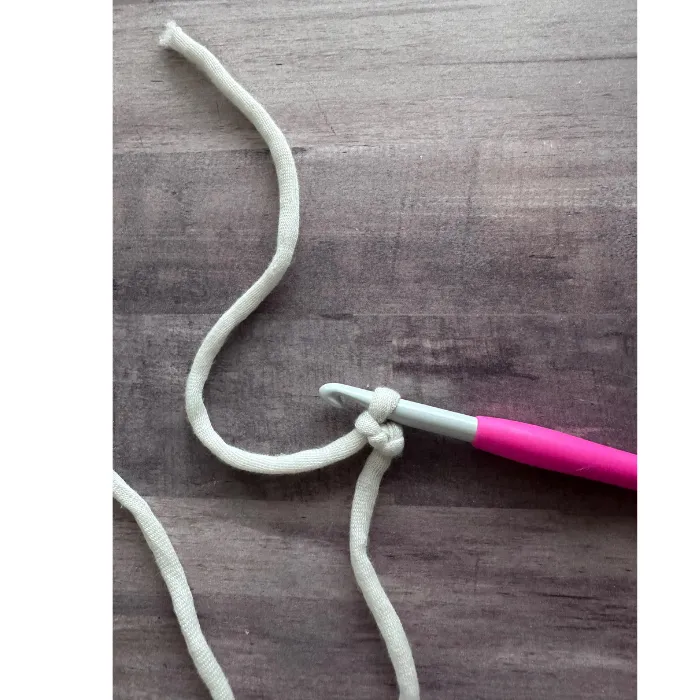
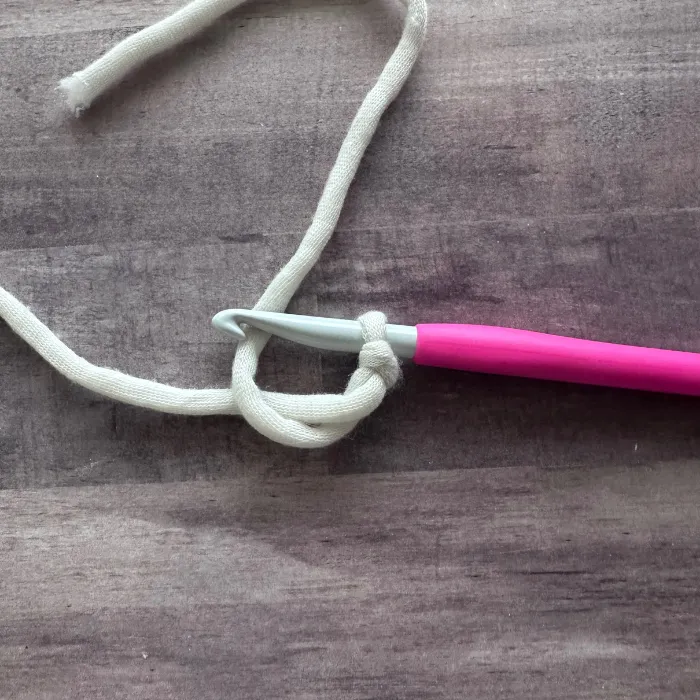
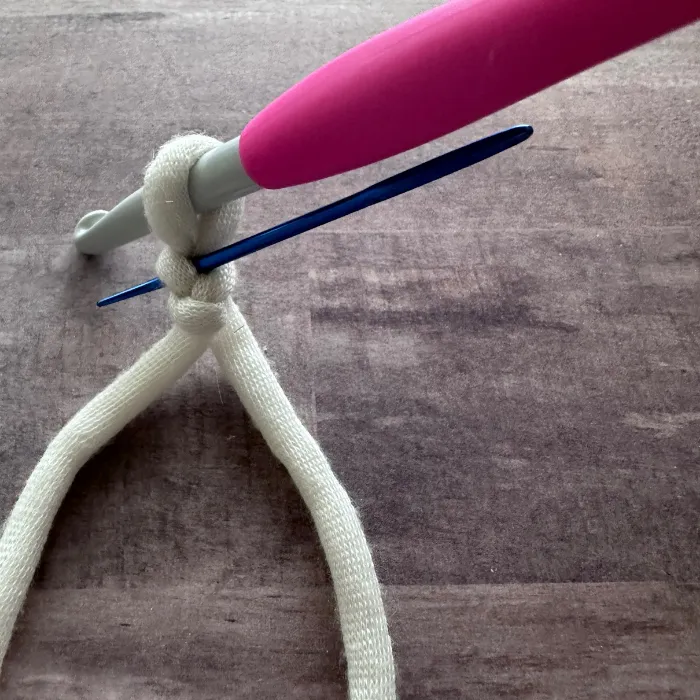
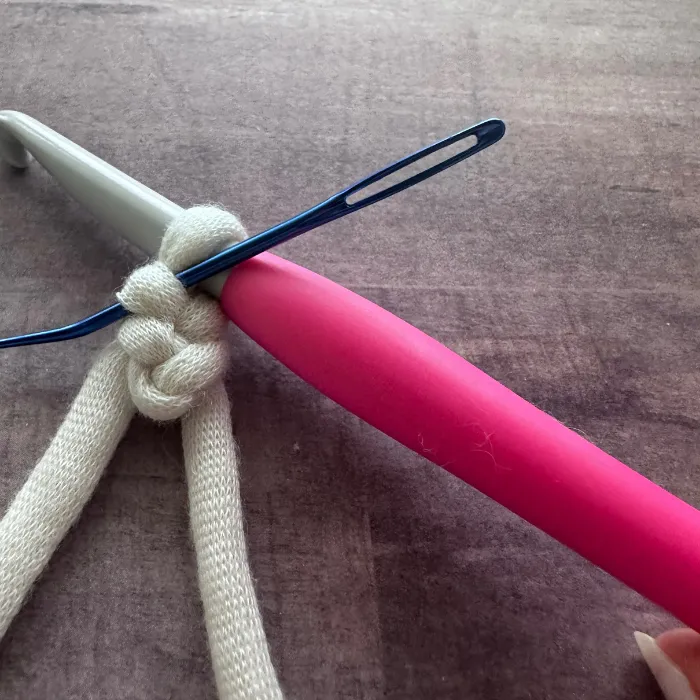
Crochet drawstring for bag
Watch video for easiest instruction.
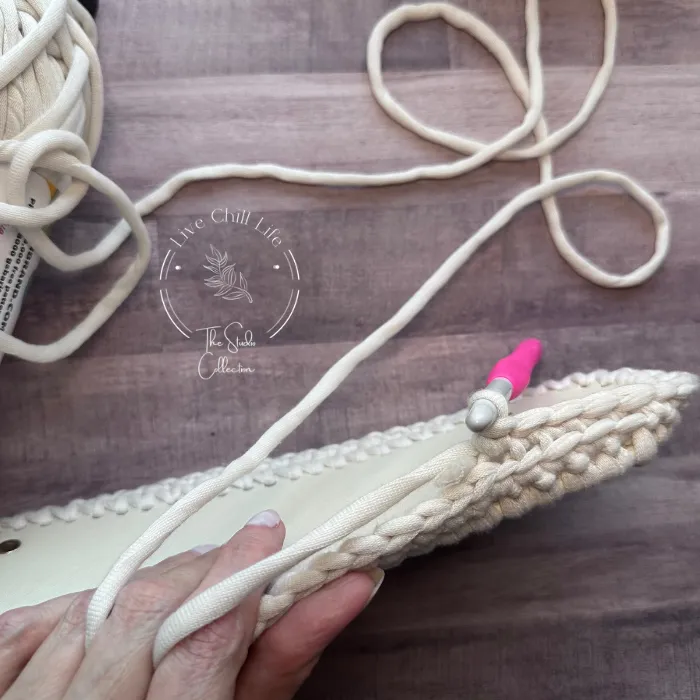
Leaving a 8-10″ tail create a slipknot. With the tail, create a chain stitch. Drop tail back then pick up working yarn.
Insert hook into left loop below hook (do not skip to stitch) and pull up a loop then complete the stitch. Repeat this stitch until drawstring measures 4-6″ longer than the circumference of bag not including the long tails on both ends.
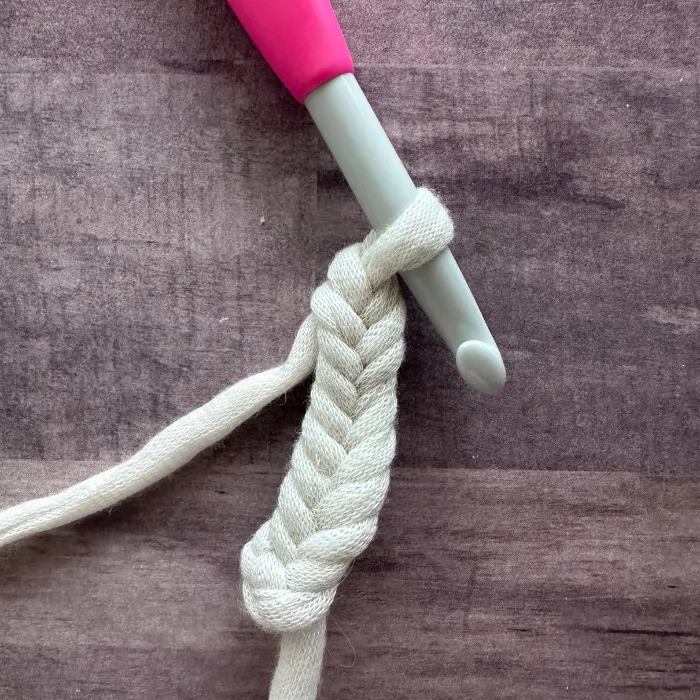
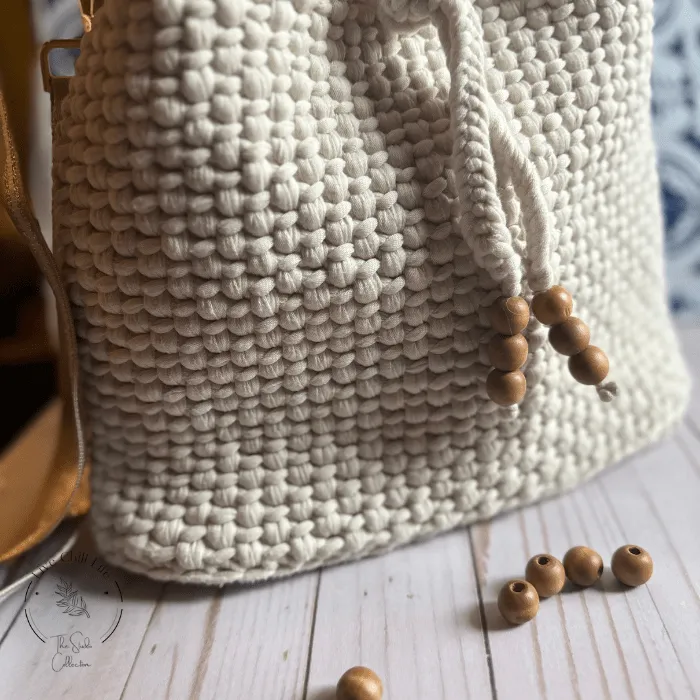
Weave strap in and out of created spaces, removing stitch markers as you go. To finish the front ties, thread the long tails with three wood beads. Create a triple knot to secure them in place. You may cut the yarn or thread it and work it up through the beads and weave into the drawstring careful not to disturb the fishbone stitch.
Attach straps and enjoy your new bag!