Ads allow content creators to provide free useful and compelling content to the public. We may earn money or products from the companies mentioned in this post. See the Affiliates and Disclosures page in the top menu of this website for detailed information.
Learn how easy the spike stitch is
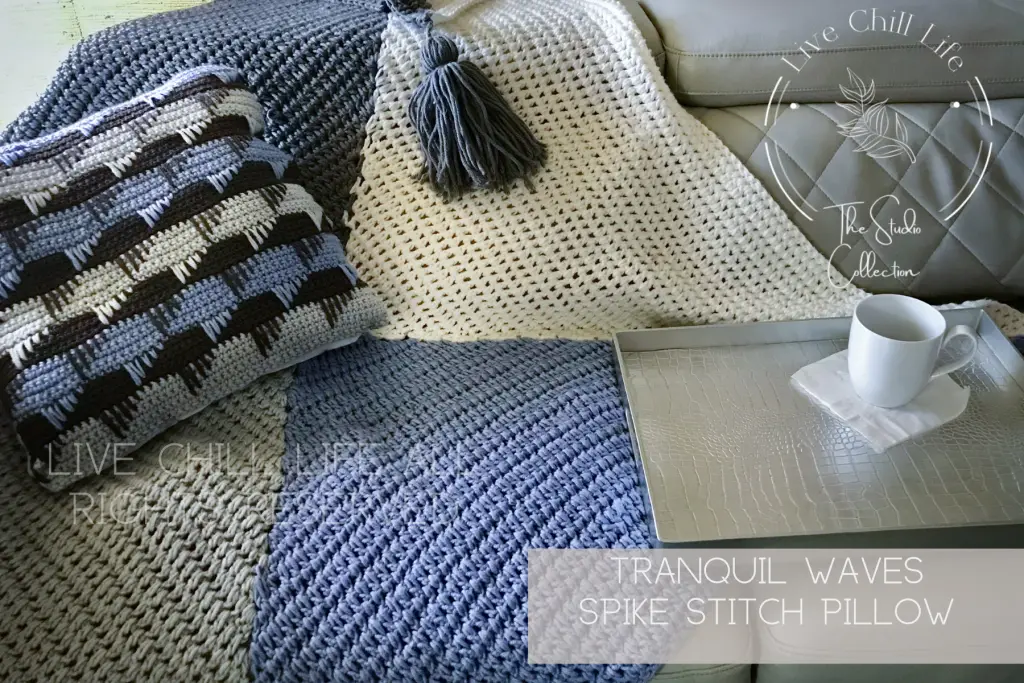
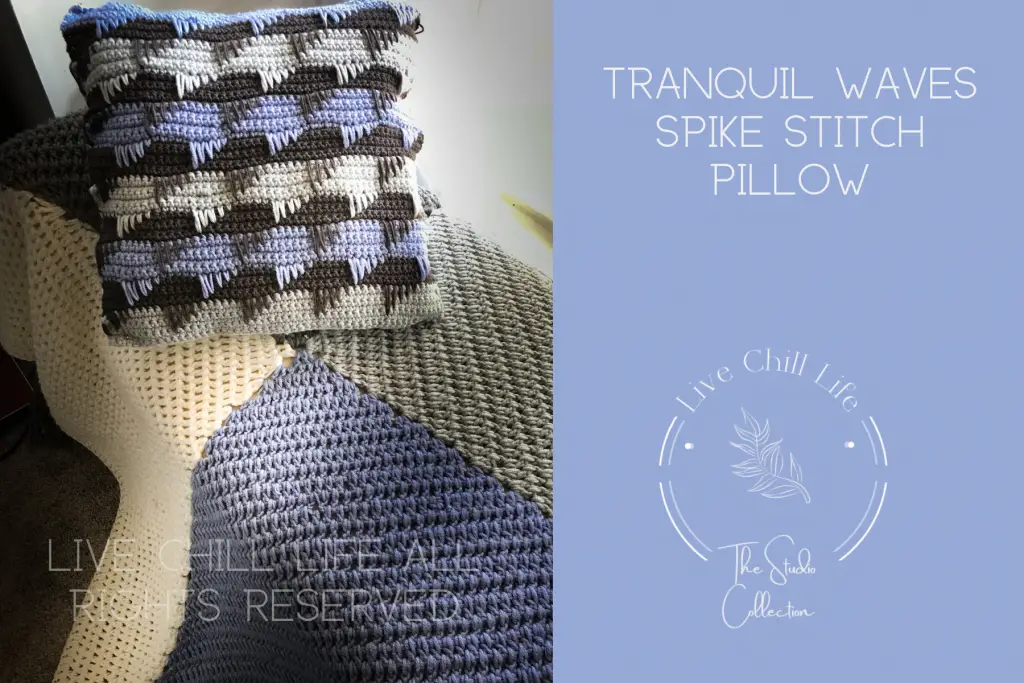
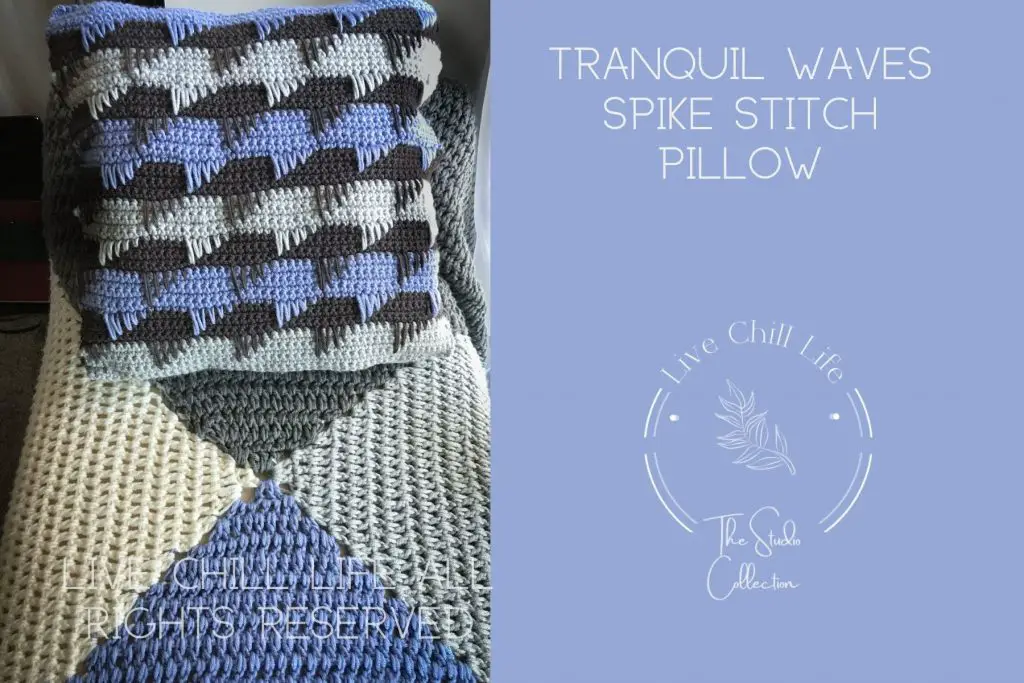
The tranquil waves crochet pillow cover uses the beginner friendly spike stitch to create texture and visual interest in one dynamic design. this textured crochet stitch adds an exciting and dramatic look to projects.
This crochet pillow cover works up quickly and could be a stash buster to match a blanket you already have!
I describe this pillow as something that falls into the category of “doing a lot with a little”. You can customize the size to fit the size to fit the pillow insert you have or will buy so you get a size that suits your decor perfectly.
If you like the blanket in the images you can find the free pattern in crochet blanket patterns.
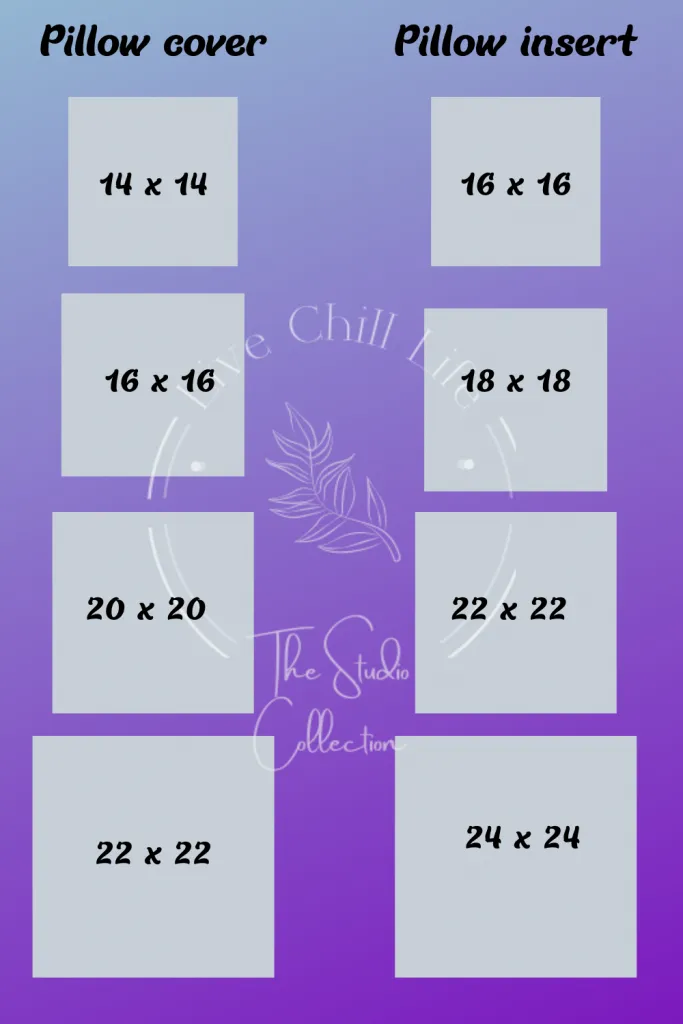
Your pillow insert should be LARGER than your crochet pillow cover for a full plump look. Crochet is a bit stretchy and will easily accommodate this size difference. In the graphic I have used the most commonly found pillow inserts available at craft stores or if you’re repurposing an existing store bought pillow to refresh the appearance.
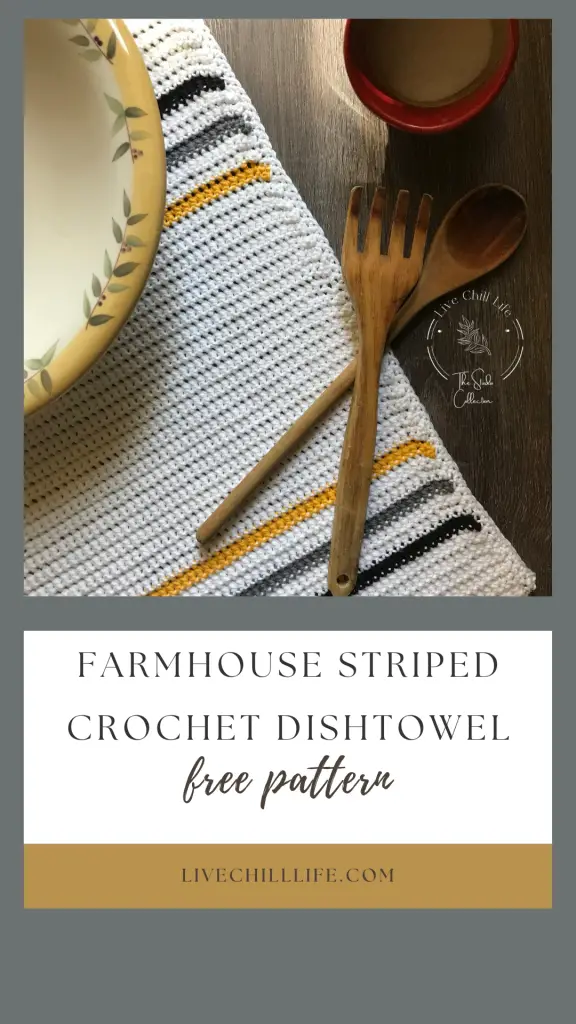
If you like colorful crochet you may like the modern farmhouse striped crochet dishtowel pattern
Note on using other yarns to achieve the same look:
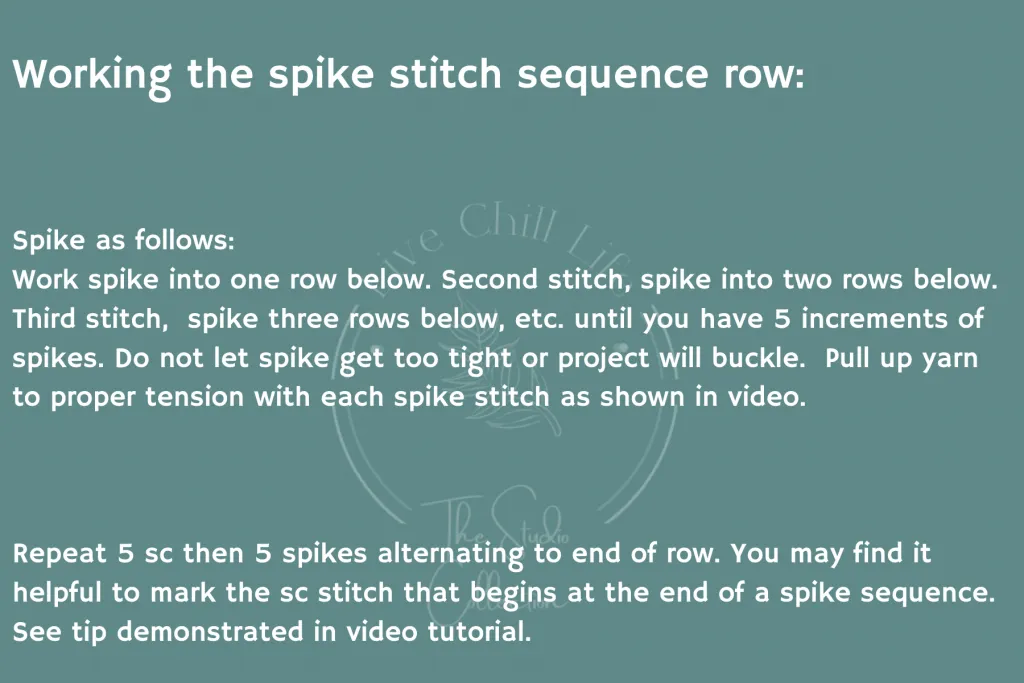
This stitch is worked in increments of 5. See video on discussion of adjusting with different yarns.
This pillow cover is 18” x 18” as shown.
Gauge (not important-base your starting chain on the yarn weight you’re using that fits the pillow insert in graphic above) 4”= 13 sts & 15 rows
Materials:
- 7 mm crochet hook (if using only category 4 yarn go down a hook size)
- Category 5 yarn in two colors (color 1 and 2 or just use one accent color) – modest amounts, several yards based on pillow size
- Category 4 yarn (main color) – modest amounts, several yards based on pillow size
- Tapestry needle
- Scissors
- Video link at end of post
Make the spike stitch crochet pillow
sc= single crochet US term
Make two panels (or one solid back and one tranquil waves pattern)
Chain 51 (color 1). Or chain in increments of 5 plus 1 to achieve the width of your pillow. Account for slip stitch seaming of final two panels.
Row 1: In second chain from hook, sc across row. 50 stitches.
Row 2-6: ch 1, sc across. Cut yarn leaving tail to weave in.
Change to main color (main color is always this stitch sequence)
Row 7: Sc in first 5 stitches.* Work spike wave stitch (see box) over next 5*. Repeat from * to * to end of row.
Row 8-12: ch 1 sc across row. Cut yarn leaving tail to weave in.
Change to color 3
Row 13. Work spike sequence in graphic.
Row 14-18: sc across row.
Change to main color
Row 19-24: Repeat row 7-12.
Change to color 1 (color 1 & 3 are always this stitch sequence)
Rows 25- 30: Repeat rows 13-18
Change to main color
Rows 31-36: Repeat rows 7-12
Change to color 3
Rows 37-42: Repeat rows 13-18
Change to main color
Rows 43-48: Repeat rows 7-12
Change to color 1
Rows 49-54: Repeat rows 13-18
Change to main color
Rows 55-60 Repeat rows 7-12
Change to color 3
Rows 61-66: Repeat row 13-18
66 rows total (or work to desired size). Ending final row, up to two rows may be omitted to achieve size needed for pillow insert. If project still appears slightly too large, slip stitch in one to two rows to tighten it up.
Secure loose ends but it’s not necessary to weave in. They will be hidden in the seaming process.
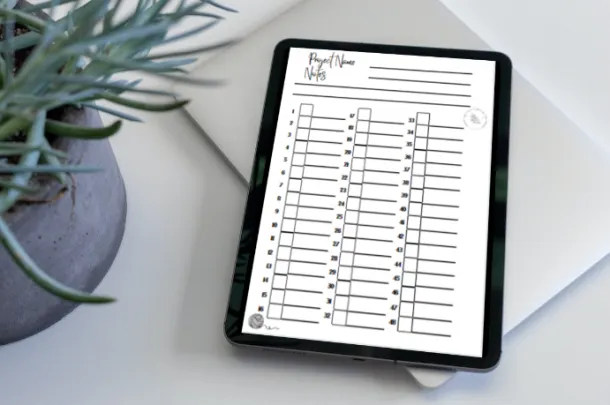
I designed project trackers! This is the large print version for tired eyes. So much easier than using apps, scraps of paper or a plain notebook.
Three project sizes, a handy ruler and hook guide inside the cover and plenty of rooms for notes in each pattern.
Buy it here.
Regular size print here.
I have had bad eyesight since age 18 so large print is a godsend when you can’t see apps and dark yarn, let alone going from one to the other on a crochet-a-thon during a netflix binge.
Assemble:
Line up both panels wrong side out matching up color ends at top and bottom. Slip stitch around 3 sides leaving top side (Iast row worked) open. Turn right side out then place pillow insert inside through open side. Using a tapestry needle threaded with yarn in same color as top side, make small discreet stitches to secure pillow cover closed. Cut yarn and weave end in securely.