Ads allow content creators to provide free useful and compelling content to the public. We may earn money or products from the companies mentioned in this post. See the Affiliates and Disclosures page in the top menu of this website for detailed information.
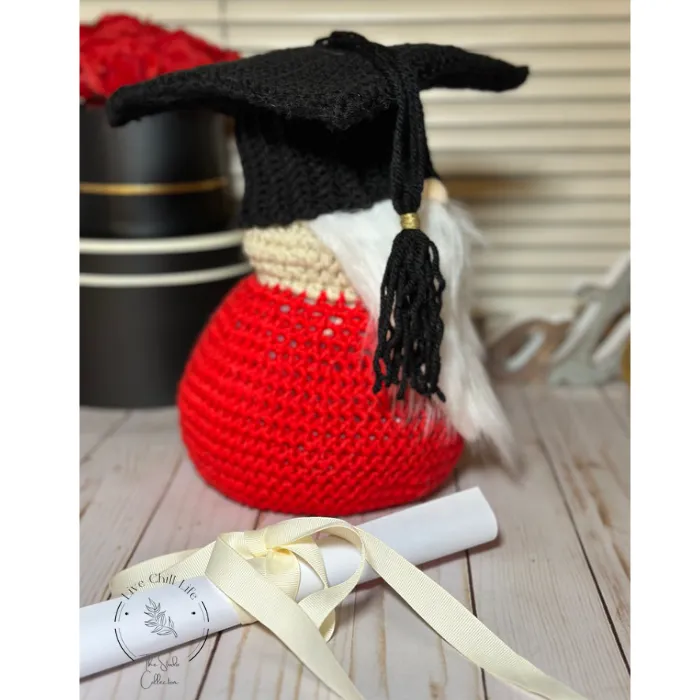
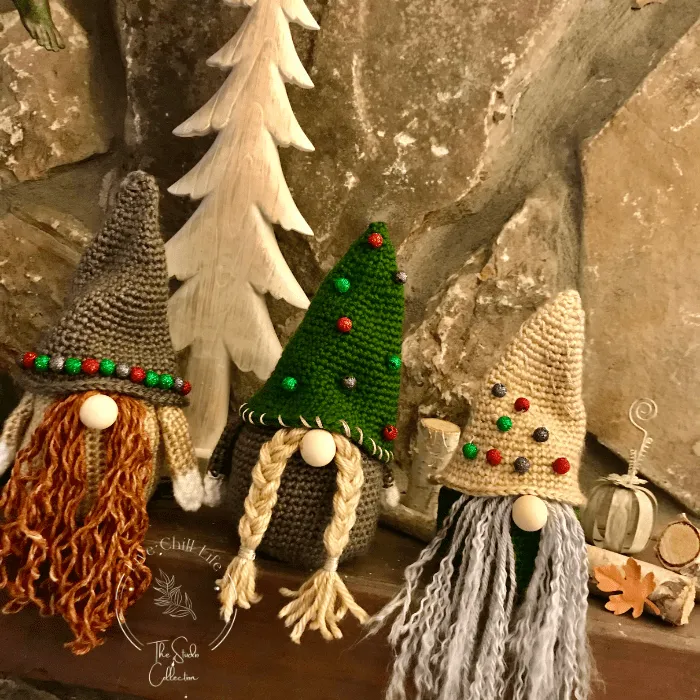
Free crochet pattern for graduate gnome

It is graduation season and you can quickly make a crochet graduate gnome with this free pattern.
Consider using traditional colors or colors that show off school spirit.
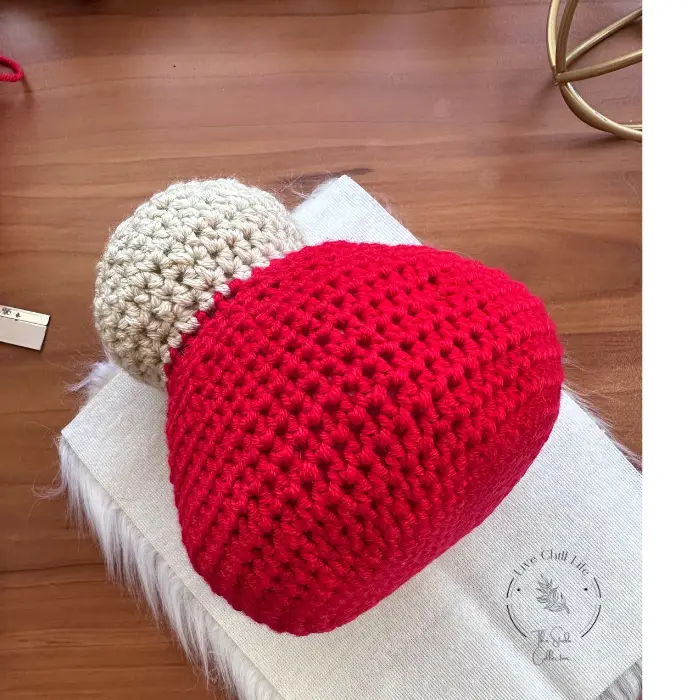
This is a medium sized gnome that stands at about 11.5″ tall. If you want a smaller gnome, go down in hook size and yarn weight, and reducing the diameter of the base.
- Make body
- Work head into body
- Separately make cap and attach
- Make tassel
Gnome body is bottom heavy to balance out the heavy hat that will be stitched on.
You may like this post on polyfil alternatives.

Gnome video tutorial link at end of this post.
Let’s get making!
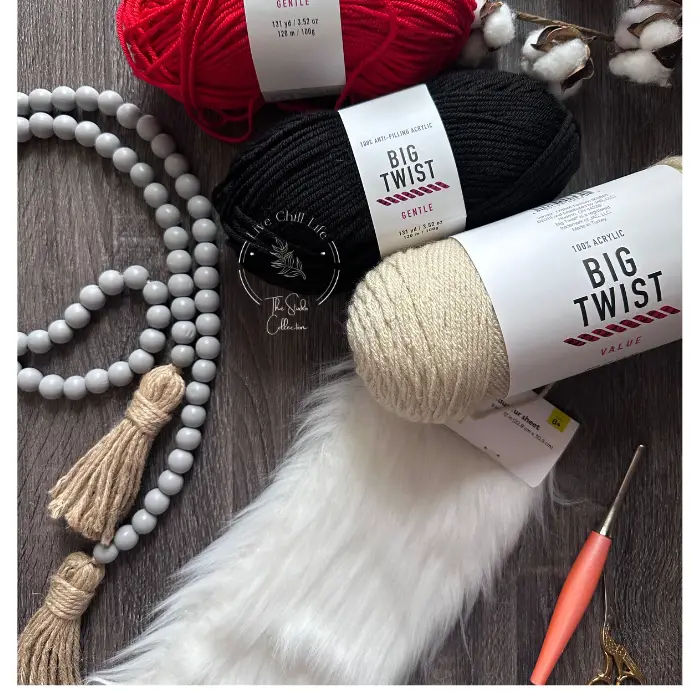
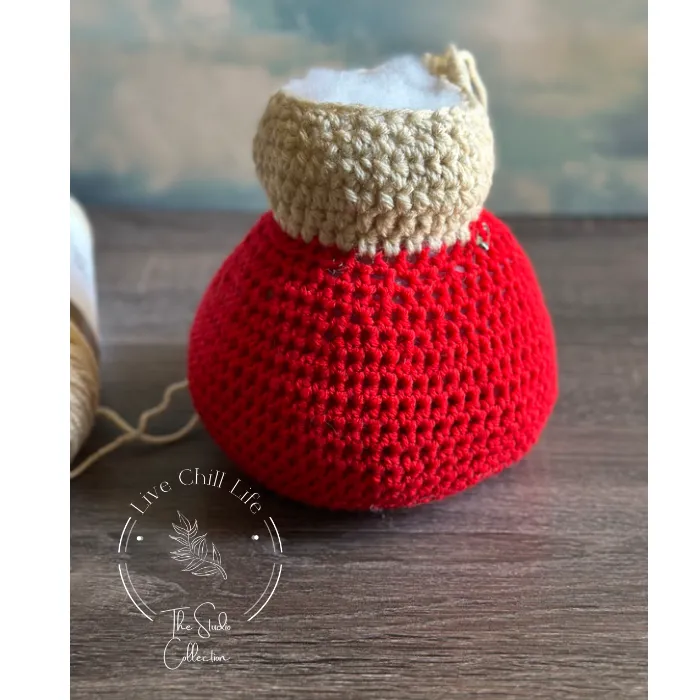
Gnome body:
Create a magic ring then sc 10 into it. (10 sts) Use stitch marker to mark end of round. Move each time and replace it to end of new round.
Round 2: *2 hdc in the next st* repeat from *to* . (20 sts)
Round 3: *hdc in the next st, 2 hdc in the next st,* repeat from *to*. (30 sts)
Round 4: *Hdc in the next 2 sts, 2 hdc in the next st,* repeat from *to* . (40 sts)
Round 5: *Hdc in the next 3 sts, 2 hdc in the next st,* repeat from *to* . (50 sts)
Round 6: *Hdc next 4 sts, 2 hdc in next st, Repeat from *to* (59 sts)
Round 7: *Hdc next 5 sts, 2 hdc in next/ Repeat from *to* (68 sts)
Move stitch marker to outside stitch of round to keep an eye on start of round-this way you won’t have to keep moving it as your work the height of the gnome body.
Round 8- 17: hdc around (68 sts)
Round 18: *sc2tg, hdc 4* repeat to end of round. (56 sts)
Round 19: *sc2tg, hdc 4* repeat to end of round.(46 sts)
Round 20: * hdc 10, sc2tg *repeat to end of round. (42)
Round 21: *sc2tg, hdc 2* (repeat to end of round (32)
Round 22: *sc2tg, hdc 5* (repeat to end of round (28)
Bring stitch marker up to top of round to keep track of start and end of round.
Stuff body semi firm before working the head
How to prevent crochet hand pain 3 ways that no one is telling you
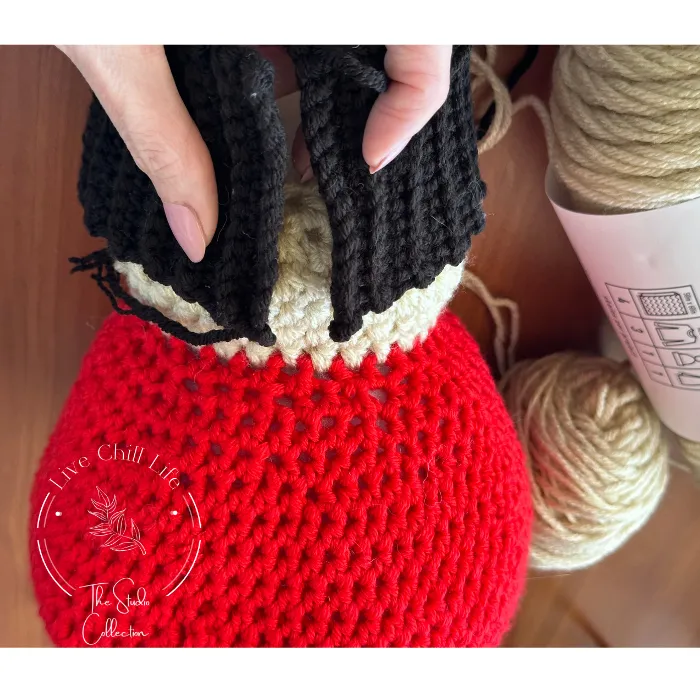
Round 23: Bring up skin tone yarn and work hdc around (28)
Round 24: Increase by working two hdc in every 4th st (35 sts)
Round 25: Repeat round 24 (43 sts)
Round 26: hdc around (43 sts)
Round 27: sc2tg every 4th st (34 sts)
Round 28: repeat round 26 (27 sts)

Cut leaving long tail to attach wooden nose bead. Attach nose bead. Secure by pulling yarn to the inside and secure.
You may also like this Woodland Gnomes free pattern
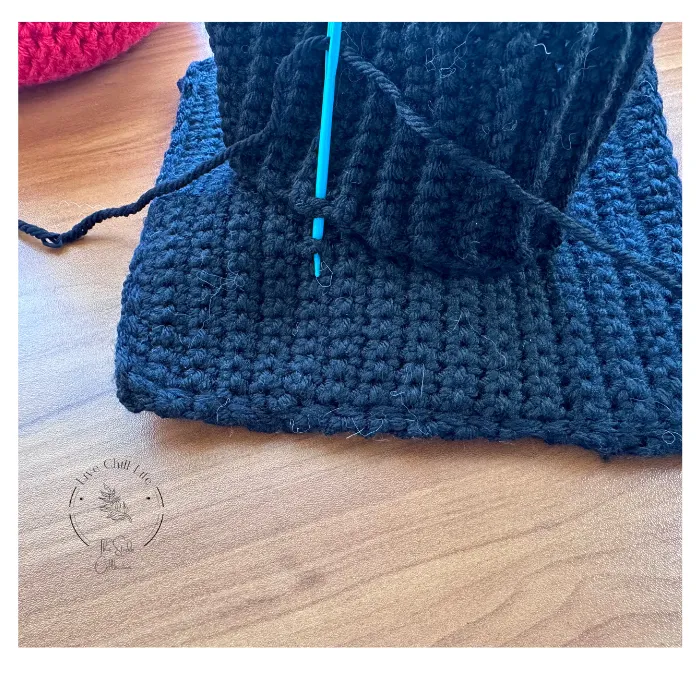
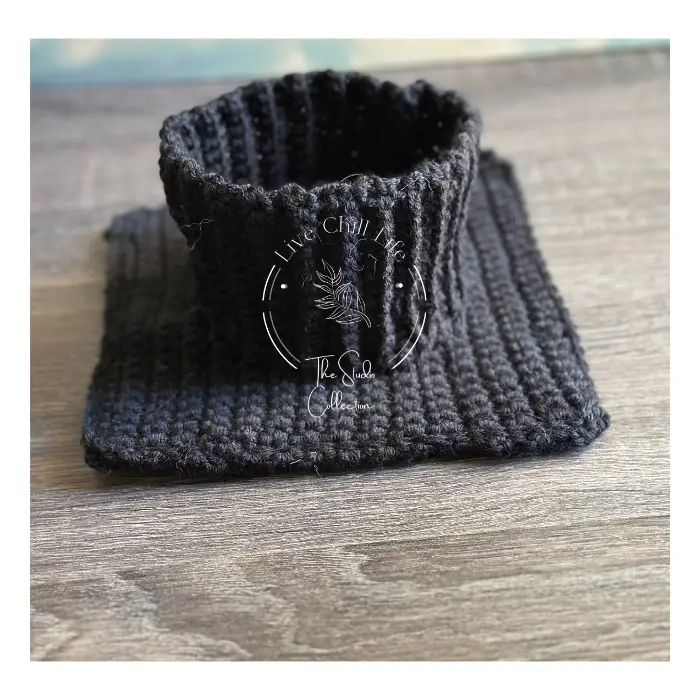
Make Gnome Graduation Cap
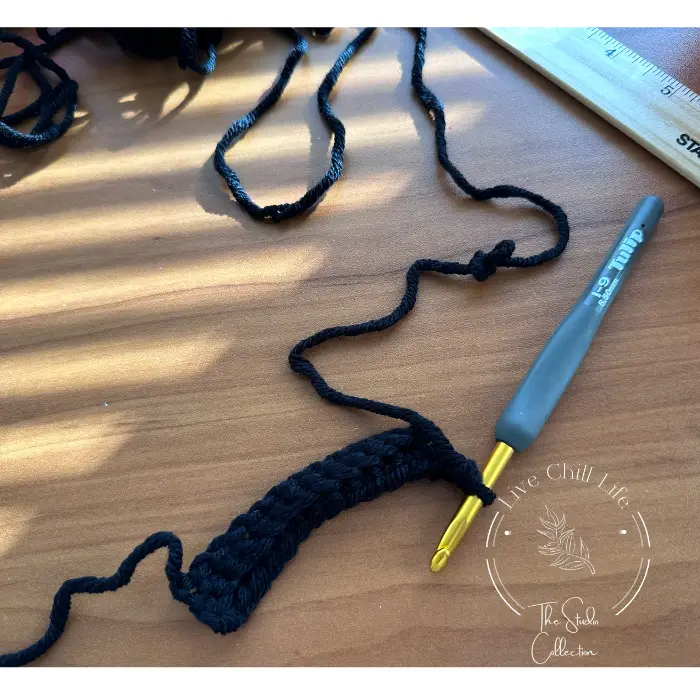
Switch to 5.5 mm hook. Create brim:
Chain enough to equal just over 3″ plus a turn chain. Sc back loop in back chain to end of row. Ch 1 turn. Continue to work ch 1, scblo until piece is long enough to go somewhat snugly around the gnome head at the midway point.
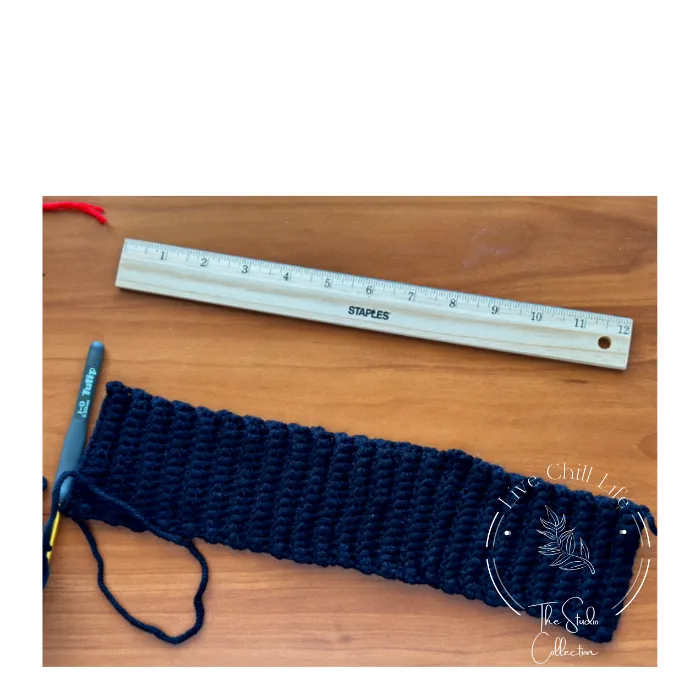
Slip stitch ends together to create the brim. Next make the hat top.
To make the square top, measure the circumference of your brim. Add 1″ to 1.25″ to each side and this will be the total inches of your square. This circumference is about 5″. 5 + 2″ = 7.” square
T-shirts and project totes for crocheters available in my Etsy shop!
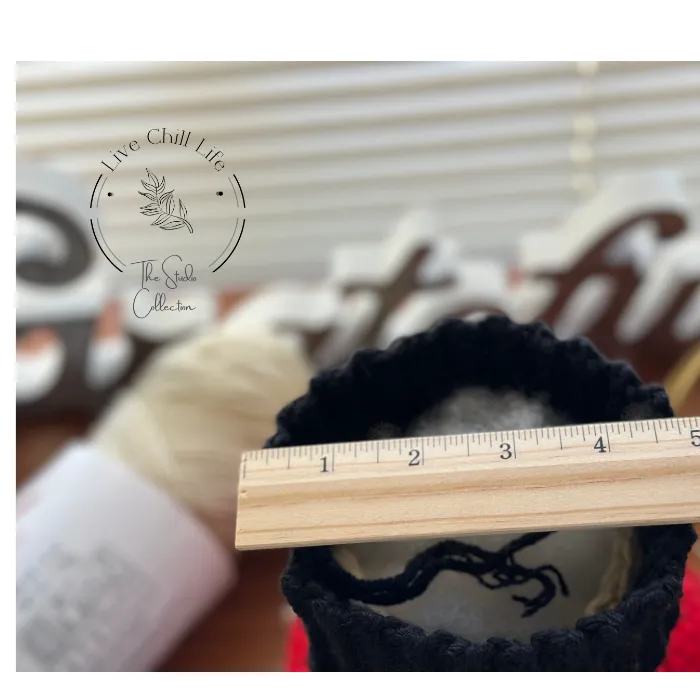
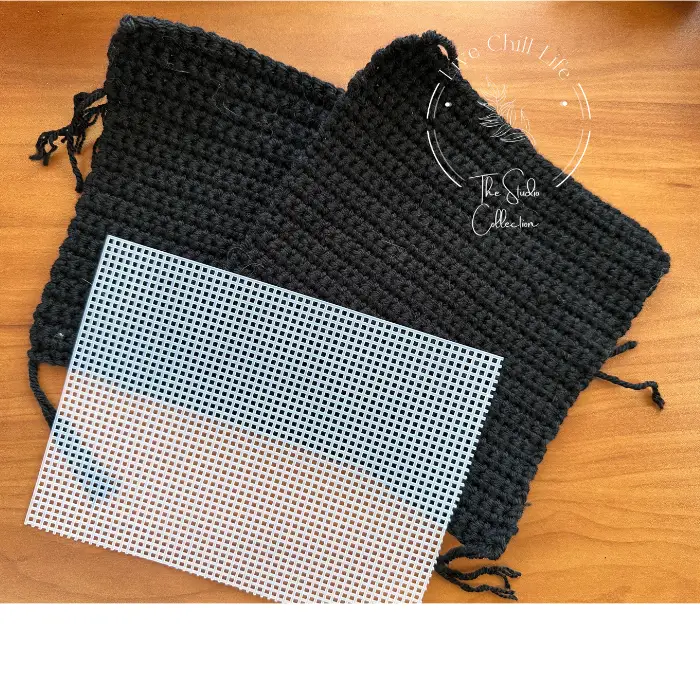
Sandwich stiffener between both squares and join them with slip stitch or with tapestry needle and yarn.
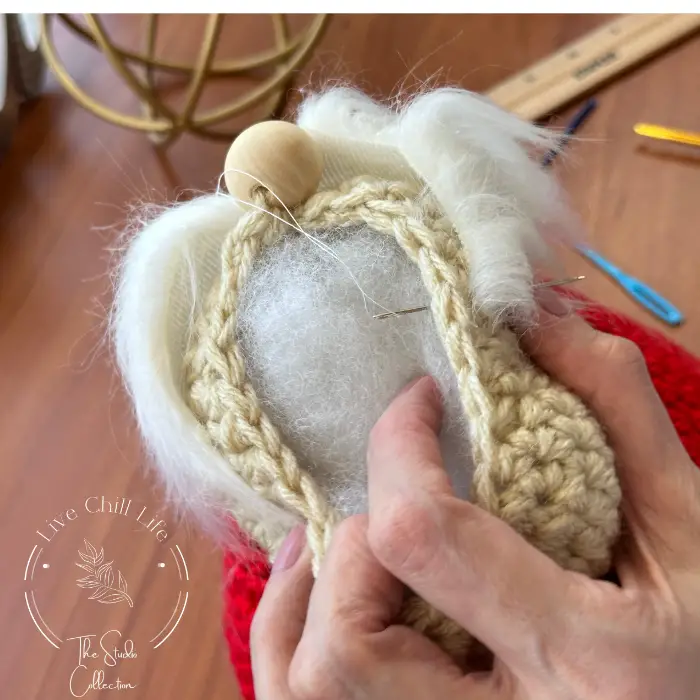
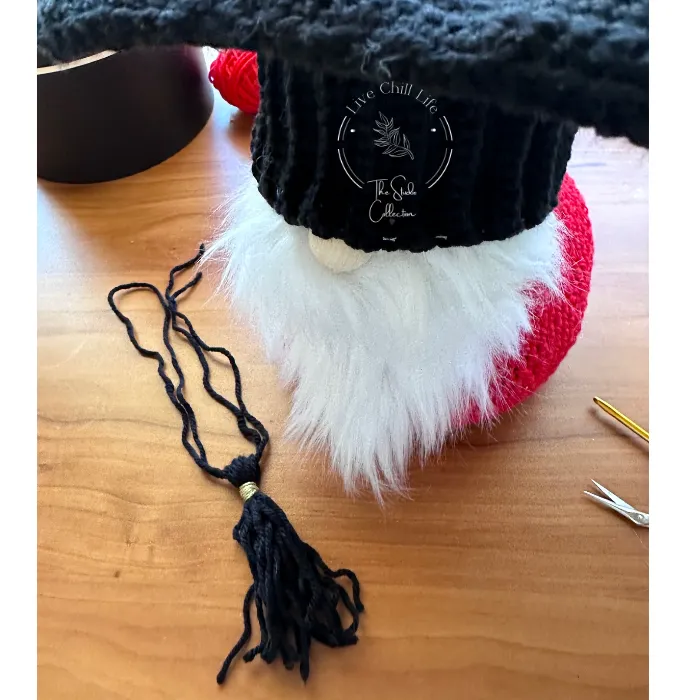
Cut and attach gnome beard
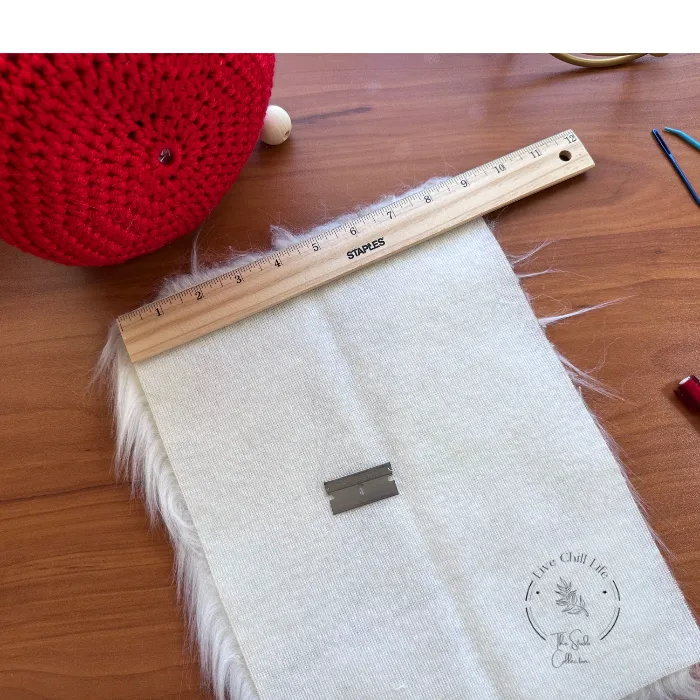
Prepare beard as shown in video and cut gently with razor blade or craft knife. Make indent in fur for nose. My beard is on the slim side to show the graduate school color of the body but you certainly can cut a full beard to cover the front of your gnome.
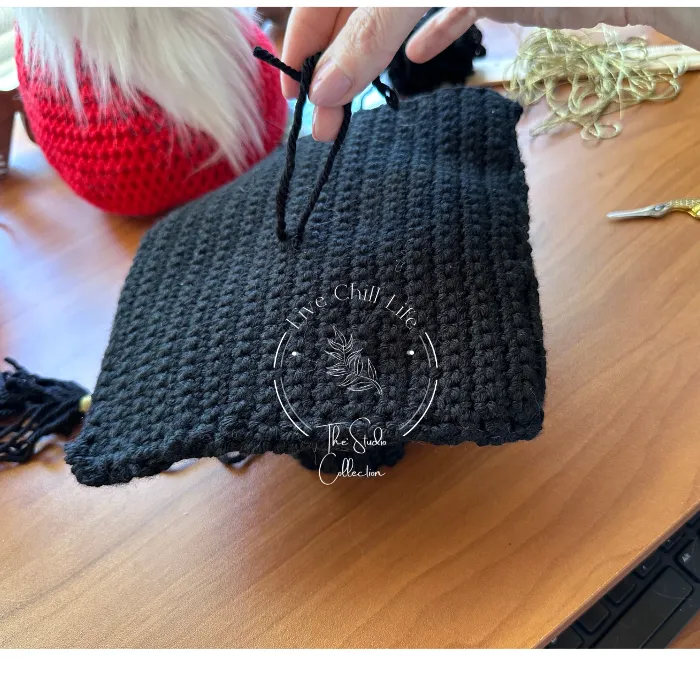
Create small loop in top of hat by inserting yarn with tapestry needle. This will hold the tassel. Adjust so knot is at the base of the hat.
You may purchase a tassel with a year of graduation attached or make your own as shown in video tutorial. Graduation charms are sold on Amazon and some craft stores. Double up yarn and make it long enough to allow tassel to drape on side of hat when secured through the top knot previously made.
Using tapestry needle, attach brim of hat to head. Lightly stuff base of hat before attaching.